PFSense SNMPv3 Installation using NET-SNMP
PFSense SNMPv3 Installation using NET-SNMP

PFSense SNMPv3 Installation using NET-SNMP
Would you like to learn how to enable Pfsense SNMPv3 feature? In this tutorial, we are going to show you all the steps required to perform the Pfsense Snmpv3 installation and configuration using the Net-snmp package in 5 minutes or less.
• Pfsense 2.4.4-p3
PFSense NET-SNMP Configuration
Open a browser software, enter the IP address of your Pfsense firewall and access web interface.
In our example, the following URL was entered in the Browser:
• https://192.168.15.11
The Pfsense web interface should be presented.
On the prompt screen, enter the Pfsense Default Password login information.
• Username: admin
• Password: pfsense
After a successful login, you will be sent to the Pfsense Dashboard.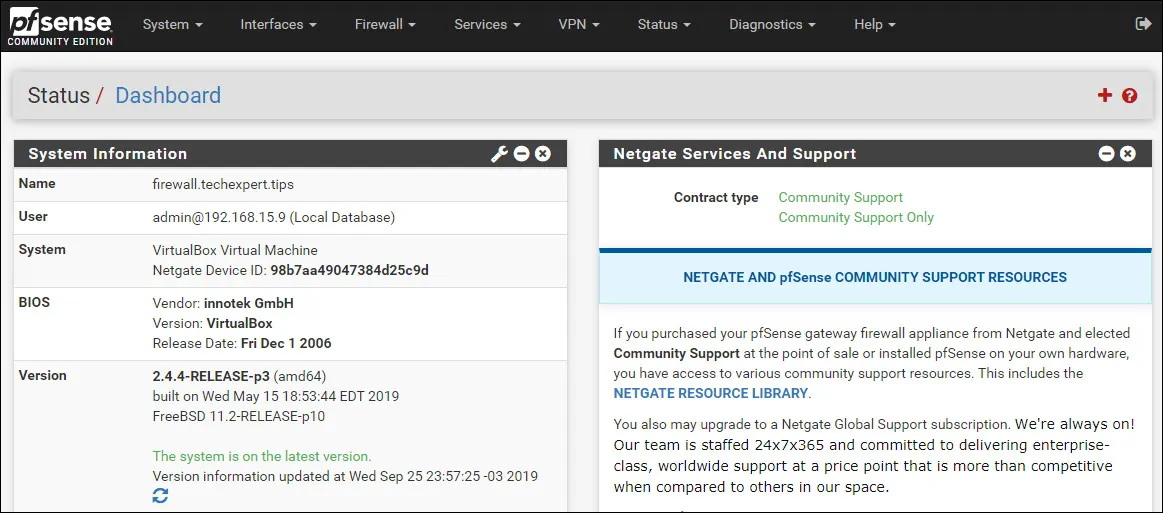
Access the Pfsense Services menu and select the SNMP option.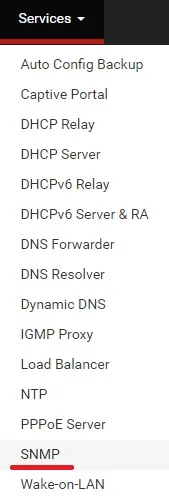
Make sure the following option is disabled: Enable the SNMP Daemon and its controls
We need to make sure the default SNMP service is disabled.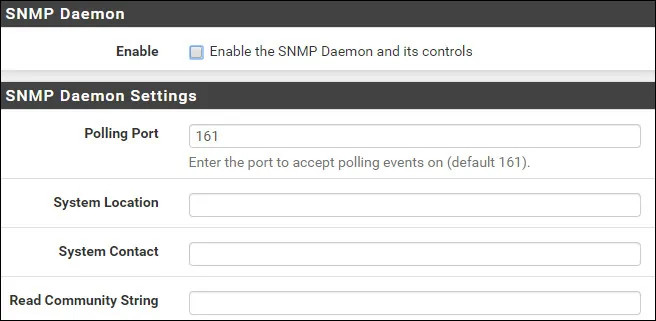
Next, we need to install the Pfsense NET-SNMP package.
Access the Pfsense System menu and select the Package manager option.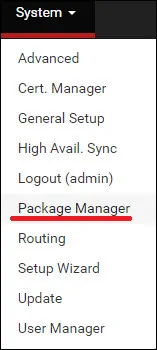
On the package manager screen, access the Available packages tab.
On the Available packages tab, search for snmp and install the Net-snmp package.
Wait the net-snmp installation to finish.
Access the Pfsense Services menu and select the SNMP(NET-SNMP) option.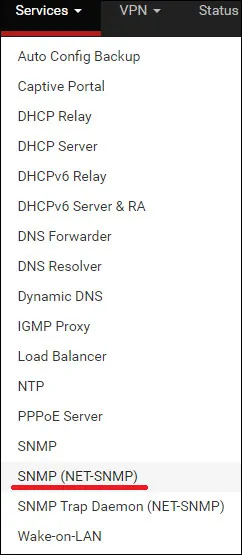
On the General tab, enable the SNMP service.
Click on the Save button on the botton part of the screen.
Access the Host information tab, you need to set a SNMP contact and a SNMP location.
Click on the Save button on the botton part of the screen.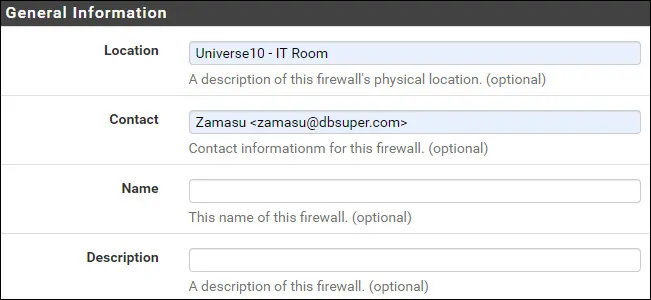
Access the Users tab and click on the Add button.
On the SNMPv3 user area, perform the following configuration:
• Username - Enter a SNMPv3 username
• Entry type - User entry (USM)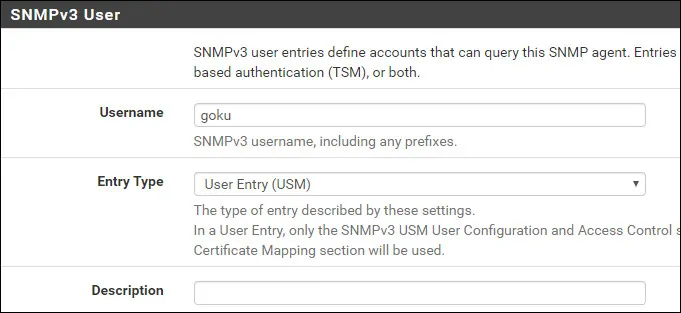
On the SNMPv3 Access Control area, perform the following configuration:
• Read/Write Access - Read Only (GET, GETNEXT)
On the SNMPv3 USM area, perform the following configuration:
• Authentication Type - SHA
• Password - Set a long authentication password
• Privay Protocol - AES
• Passphrase - Set a long encryption password
• Min USM Security Level - Private (Encryption Required)
Click on the Save button on the botton part of the screen.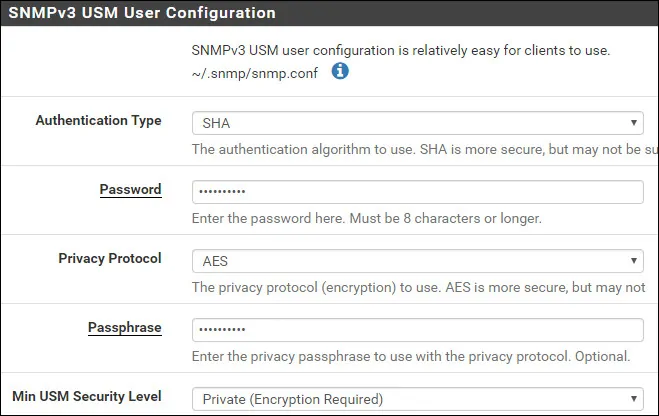
In our example, a SNMPv3 acount named goku was created and configured to use the following settings:
• Authentication password: 0123456789
• Authentication protocol: SHA
• Encryption password: 9876543210
• Encryption protocol: AES
You have successfully enabled the Pfsense NET-SNMP service.
You have successfully configured the Pfsense SNMPv3 service.
PFSense SNMP Firewall Configuration
By default, the PFsense firewall does not allow external SNMP connections to the WAN interface.
In our example we are going to create a firewall rule to allow the SNMP communication.
Access the Pfsense Firewall menu and select the Rules option.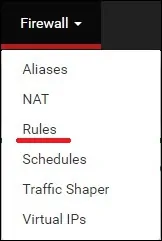
Click on the Add button to add a rule to the Top of the list.![]()
On the Firewall rule creation screen, perform the following configuration:
• Action - Pass
• Interface - WAN
• Address family - IPV4
• Protocol - UDP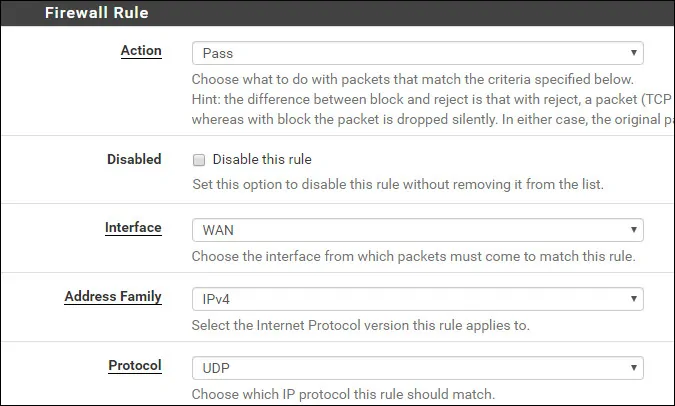
On the Source configuration screen, you need to define the IP address that should be allowed to perform SNMP communication with the Pfsense firewall.
In our example, any computer is able to perform SNMP communication with the firewall.
On the Firewall destination screen, perform the following configuration:
• Destination - Wan address
• Destination port range- From SNMP 161 to SNMP 161
On the Firewall Extra options screen, you may enter a description to the firewall rule.
Click on the Save button, you will be sent back to the Firewall configuration screen.
Now, you need to reload the firewall rules to apply the SNMP configuration.
Click on the Apply changes button to reload the firewall configuration.
You have finished the PFsense firewall configuration to allow SNMP communication using the WAN interface.
PFSense - Testing the SNMP Configuration
To test the Pfsense SNMP configuration from a computer running Ubuntu Linux:
Use the following commands to install the required packages and test the Pfsense SNMP communication.Copy to Clipboard1
apt-get install snmp
2
snmpwalk -v 3 -u goku -l authPriv -a SHA -A 0123456789 -x AES -X 9876543210 192.168.15.11
Keep in mind that you need to change the SNMPv3 username, the authentication password, the encryption password and the PFsense IP address to reflect your environment.
To test the Pfsense SNMP configuration from a computer running Windows:
Download the SNMP Tester aplication, and test the communication using the following parametes:
• V3 SNMP User: Your SNMPv3 user account.
• Device IP: Your Pfsense IP address
• SNMP Version: V3
• V3 SNMP User: Your snmpv3 username
• V3 Authentication: SHA
• V3 Password: Your authentication password.
• Encryption: AES
• V3 Encryption Key: Your encryption password.
• Select Request type: Scan Interfaces
Here is an example from my Pfsense configuration.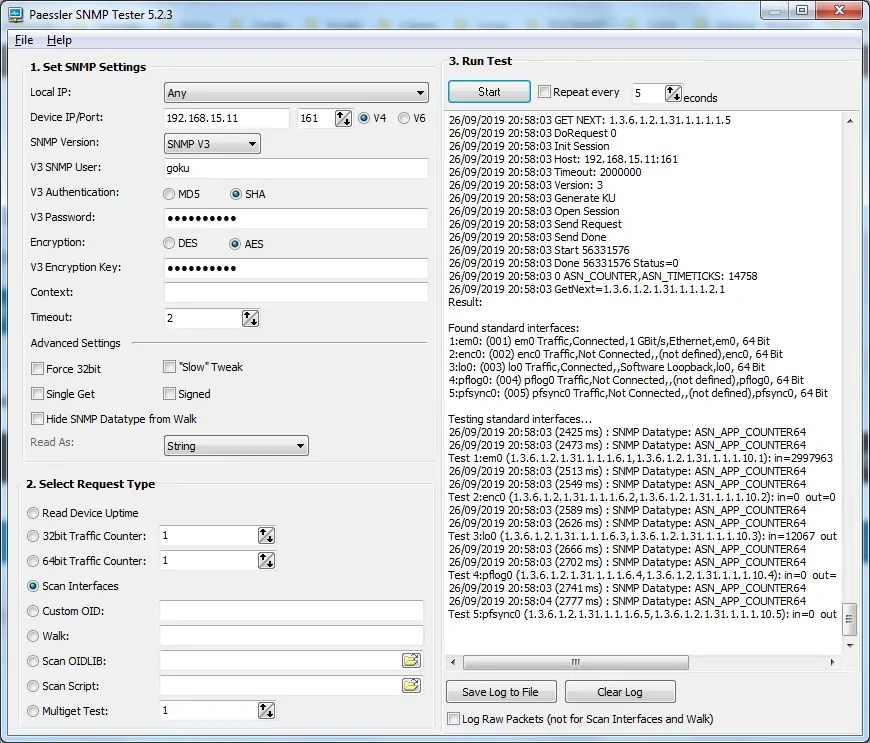
You have successfully performed a Pfsense SNMPv3 communication test.


