Pfsense - Traffic Shaper Configuration
Pfsense - Traffic Shaper Configuration

Pfsense - Traffic Shaper Configuration
Would you like to learn how to configure the Pfsense traffic shaper feature? In this tutorial, we are going to show you all the steps required to perform traffic shaping on a Pfsense server in 5 minutes or less.
• Pfsense 2.4.4-p3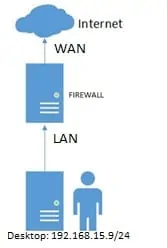
In our example, we are going to limit the download speed of a desktop on the local network to 20 KBytes.
PFSense - Traffic Shaper Configuration
Open a browser software, enter the IP address of your Pfsense firewall and access web interface.
In our example, the following URL was entered in the Browser:
• https://192.168.15.11
The Pfsense web interface should be presented.
On the prompt screen, enter the Pfsense Default Password login information.
• Username: admin
• Password: pfsense
After a successful login, you will be sent to the Pfsense Dashboard.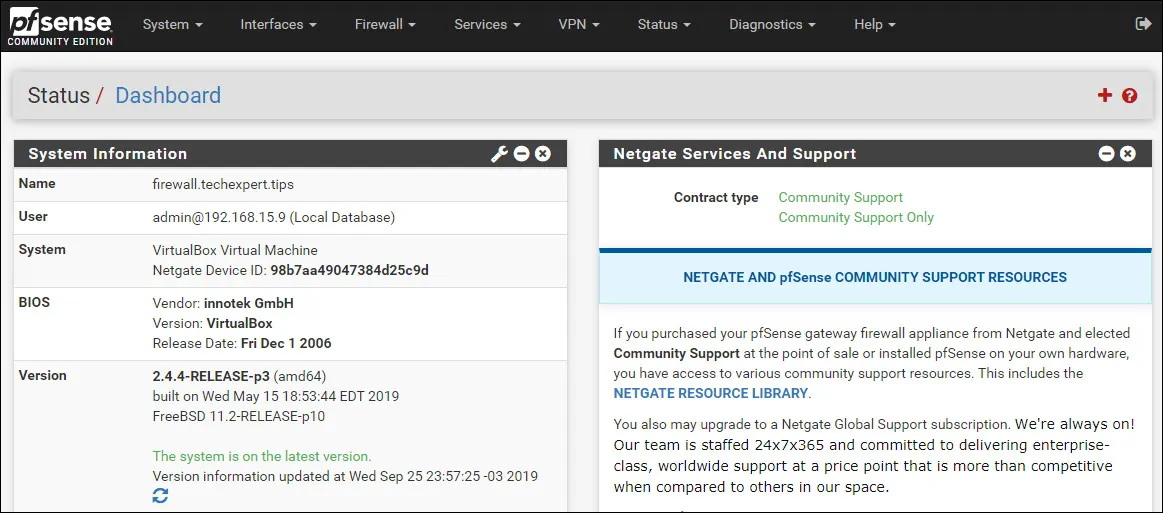
Access the Pfsense Firewall menu and select the Traffic Shaper option.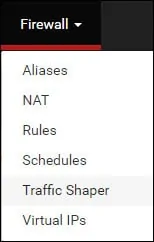
On the Traffic shaper screen, access the Limiters tab.
On the Limiters tab, create a new DOWNLOAD limiter and perform the following configuration:
• Enable - Yes
• Name - Enter a name to identify your limiter.
• Bandwidth - 160 K/bit
• Mask - Source addresses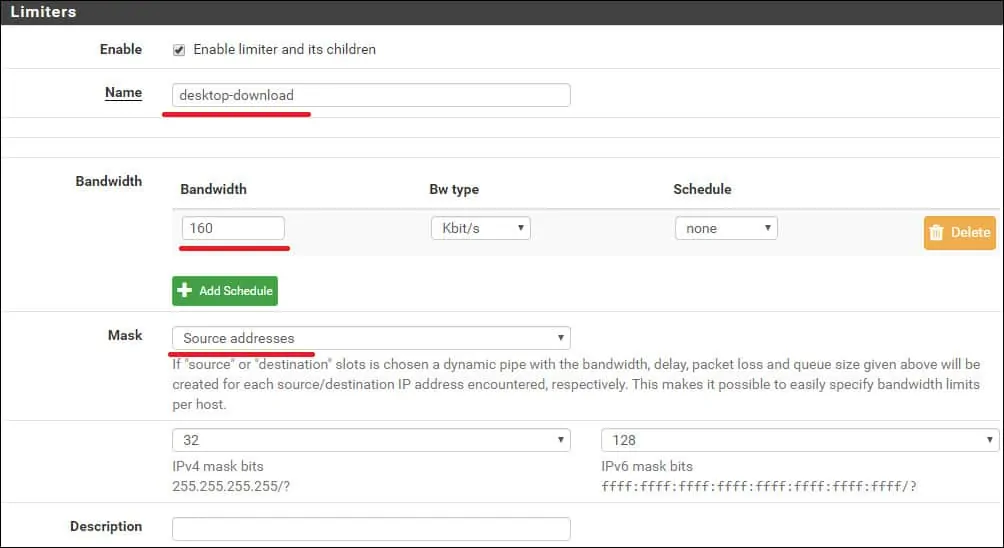
Keep in mind that we are using Kbits and not KBytes.
20KBytes = 160 Kbits.
160 Kbits is equivalent to 20KBytes.
On the Limiters tab, create a new UPLOAD limiter and perform the following configuration:
• Enable - Yes
• Name - Enter a name to identify your limiter.
• Bandwidth - 160 K/bit
• Mask - Source addresses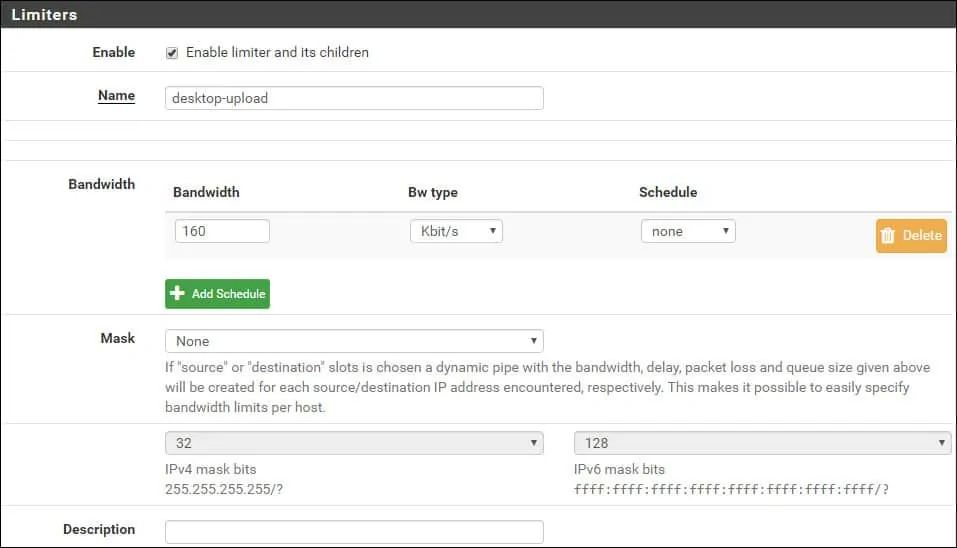
You have finished the Pfsense Traffic shaper limitations.
PFSense - Traffic Shaping Configuration
Now, we need to create a Firewall rule that will use the Traffic shaper configuration created before.
Access the Pfsense Firewall menu and select the Rules option.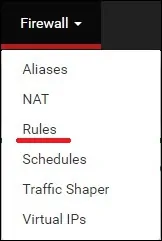
Click on the Add button to add a rule to the Top of the list.![]()
On the Firewall rule creation screen, perform the following configuration:
• Action - Pass
• Interface - LAN
• Address family - IPV4
• Protocol - ANY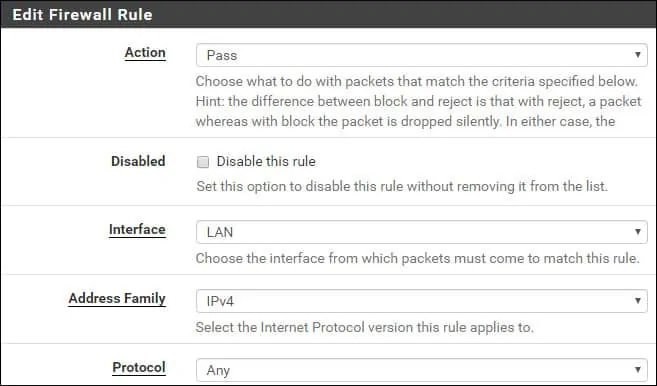
On the Source area, you need to set the source IP address that will be limited to 20KBytes.
In our example, we specified the source IP address 192.168.15.9.
On the Extra options area, click on the Display advanced button.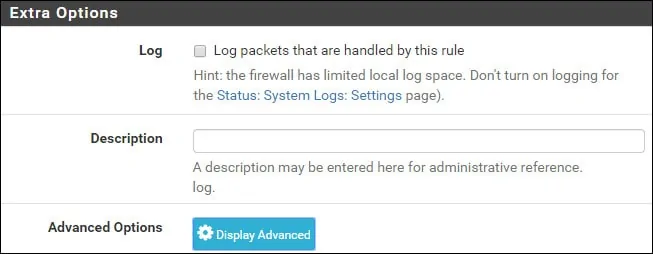
On the Advanced options area, locate the In/Out pipe options and select the Download and Upload shaper policy.
In our example, we set the traffic shaper named desktop-download to limit the download speed.
In our example, we set the traffic shaper named desktop-upload to limit the upload speed.
Click on the Save button, you will be sent back to the Firewall configuration screen.
Now, you need to reload the firewall rules to apply the Traffic shaper configuration.
Click on the Apply changes button to reload the firewall configuration.
You have finished the PFsense firewall configuration to allow the traffic shaper configuration to work.
PFSense - Traffic Shaping Testing
On the Desktop computer, wait a couple of minutes to the rules to be completed applied.
Then, try to download a large file and take a look at the download speed.
In our example, the download speed is limited to 20KBytes.


