Squid Installation on PFsense
Squid Installation on PFsense
Squid Installation on PFsense
Would you like to learn how to install Squid on Pfsense?In this tutorial, we are going to show you all the steps required to perform the Squid installation on a Pfsense server in 5 minutes or less.
• Pfsense 2.4.4-p3
PFSense - Squid Installation
Open a browser software, enter the IP address of your Pfsense firewall and access web interface.
In our example, the following URL was entered in the Browser:
• https://192.168.15.30
The Pfsense web interface should be presented.
On the prompt screen, enter the Pfsense Default Password login information.
• Username: admin
• Password: pfsense
After a successful login, you will be sent to the Pfsense Dashboard.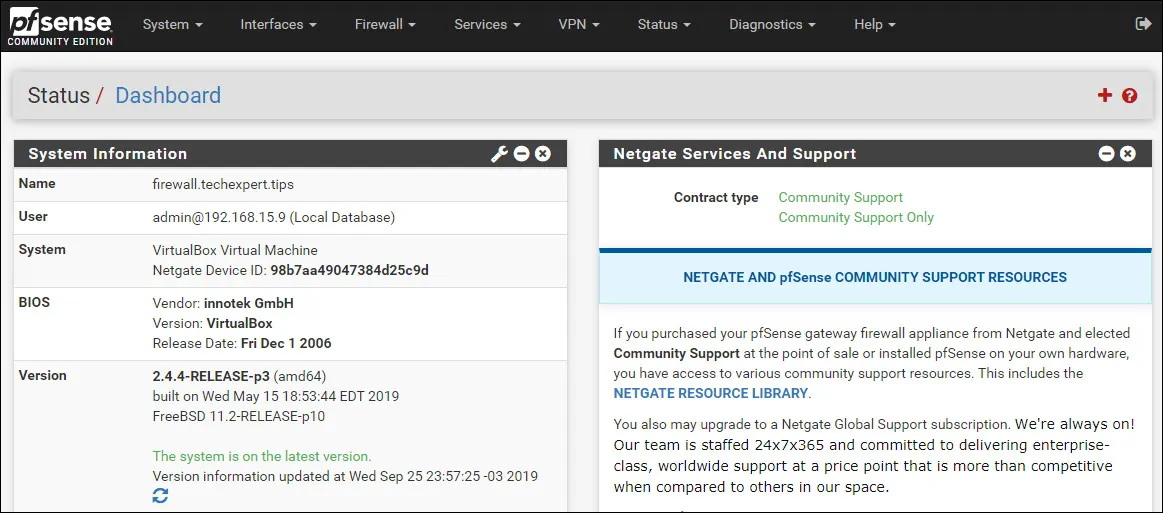
Access the Pfsense System menu and select the Package manager option.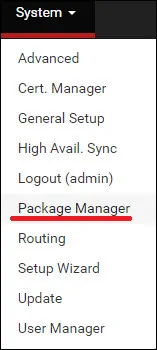
On the package manager screen, access the Available packages tab.
On the Available packages tab, search for SQUID and install the Squid package.
In our example, we installed the Squid package version 0.4.44_9.
Wait the Squid installation to finish.
Access the Pfsense Services menu and select: Squid Proxy Server.
On the Local cache tab, locate the Squid Hard Disk Cache Settings and perform the following configuration:
• Hard Disk Cache Size - 1000
Click on the Clear Disk Cache now button and click on the Save button.
In our example, we configured 1000MB of local cache for the Proxy service.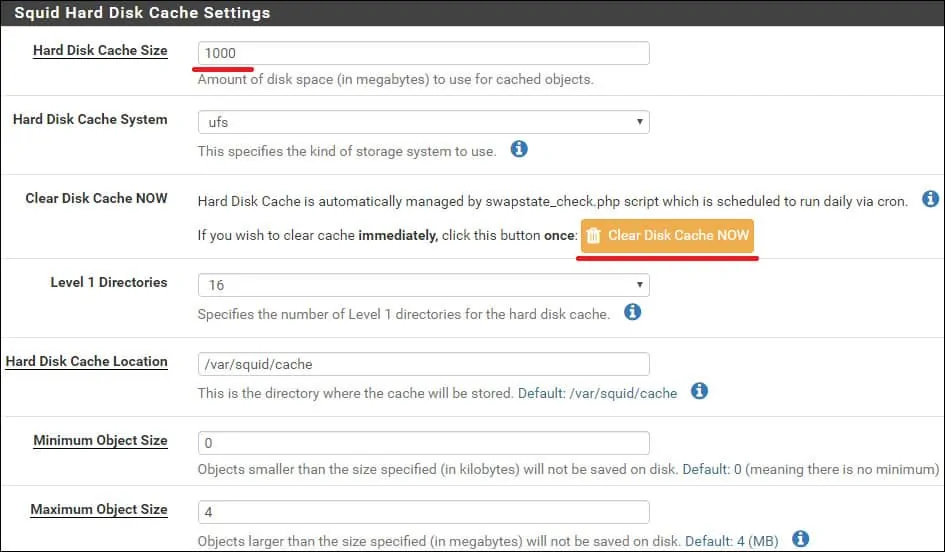
On the ACSs tab, locate the Squid Access Control Lists area and perform the following configuration:
• Allowed Subnets - Enter the IP networks that will be allowed to use the proxy service.
Click on the Save button.
On the General tab, locate the Squid General Settings area and perform the following configuration:
• Enable Squid Proxy - Yes
• Proxy Interface(s) - LAN
• Proxy Port - 3128
• Resolve DNS IPv4 First - Yes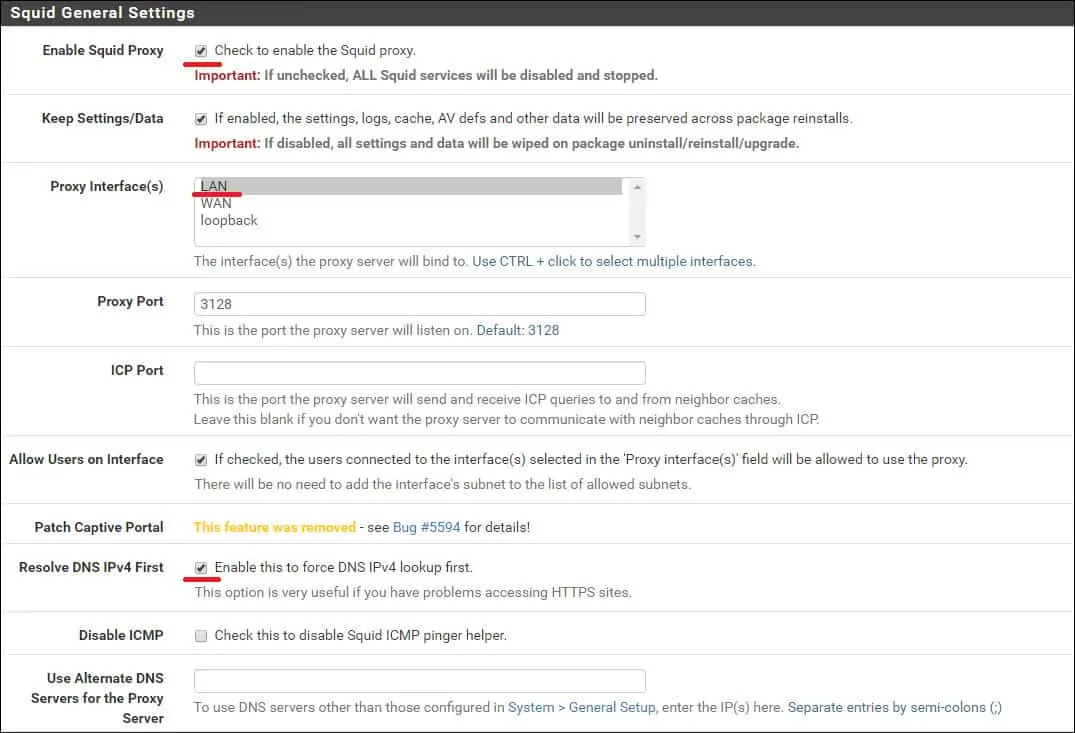
Locate the Logging settings area and perform the following configuration:
• Enable Access Logging - Yes
• Log Store Directory - /var/squid/logs
• Rotate Logs - 30
Click on the Save button to start the Squid Proxy service.
To check the status of the service, acess the PFsense Status menu and select the Services option.
In our example, the Squid proxy service is up and running.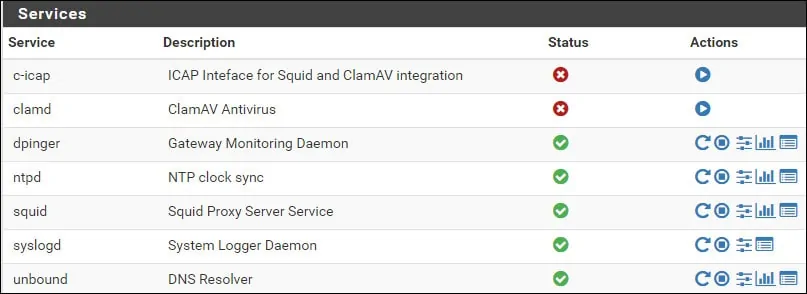
Congratulations! You have finished the Squid installation on a Pfsense server.
PFSense - Configure the Browser to use Squid
After finishing installation, you need to learn how to configure the Browse software to use the Pfsense Proxy server.
On Mozilla firefox, access the options menu and scroll down until the Network settings area.
Configure the proxy configuration, as shown.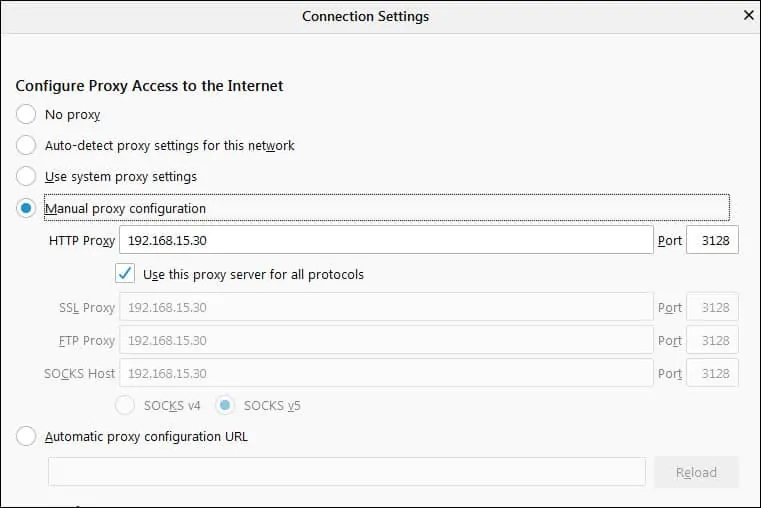
You are now able to access the Internet using the Pfsense Proxy.


