


PFSense - Active Directory Authentication using LDAP over SSL
PFSense - Active Directory Authentication using LDAP over SSL

PFSense - Active Directory Authentication using LDAP over SSL
Would you like to learn how to configure the PFsense Active directory authentication using LDAP over SSL? In this tutorial, we are going to show you how to authenticate PFSense users on the Active Directory database using the LDAPS protocol for an encrypted connection.
• Pfsense 2.4.4-p3
• Windows 2012 R2
Tutorial - Active Directory Installation on Windows
• IP - 192.168.15.10.
• Operacional System - Windows 2012 R2
• Hostname - TECH-DC01
• Active Directory Domain: TECH.LOCAL
If you already have an Active Directory domain, you may skip this part of the tutorial.
Open the Server Manager application.
Access the Manage menu and click on Add roles and features.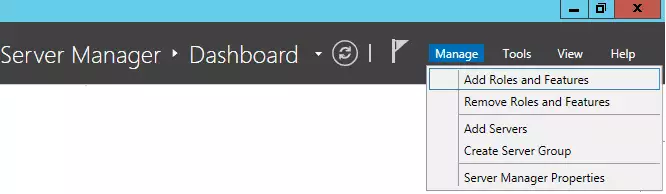
Access the Server role screen, select the Active Directory Domain Service and click on the Next button.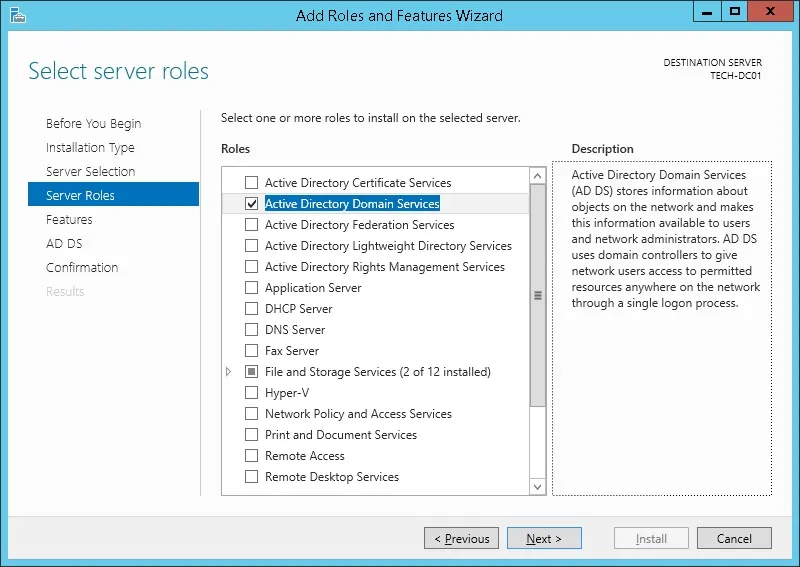
On the following screen, click on the Add features button.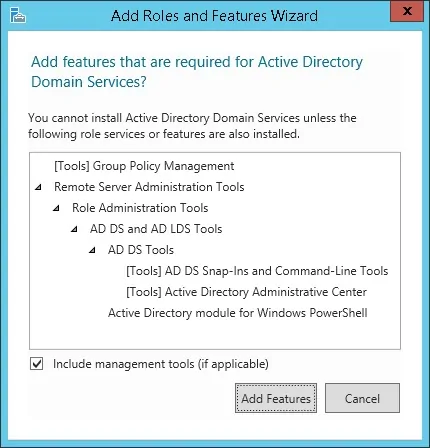
Keep clicking on the Next button until you reach the last screen.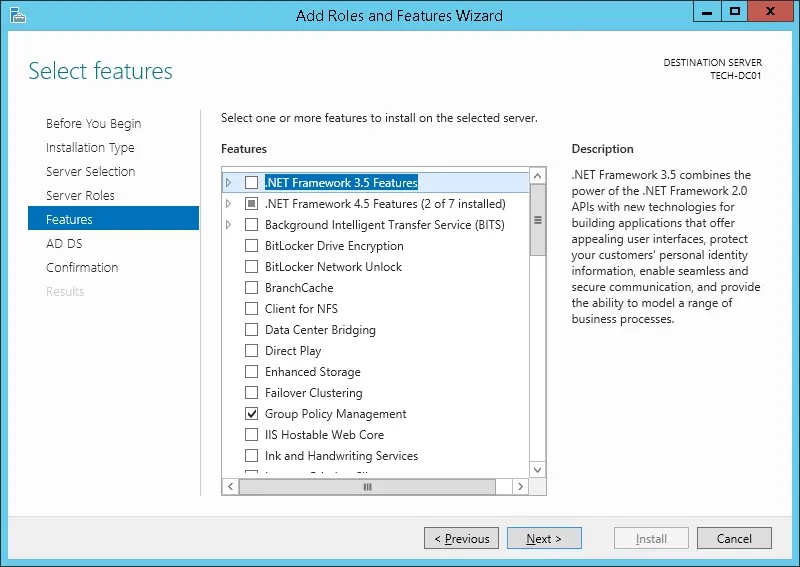
On the confirmation screen, click on the Install button.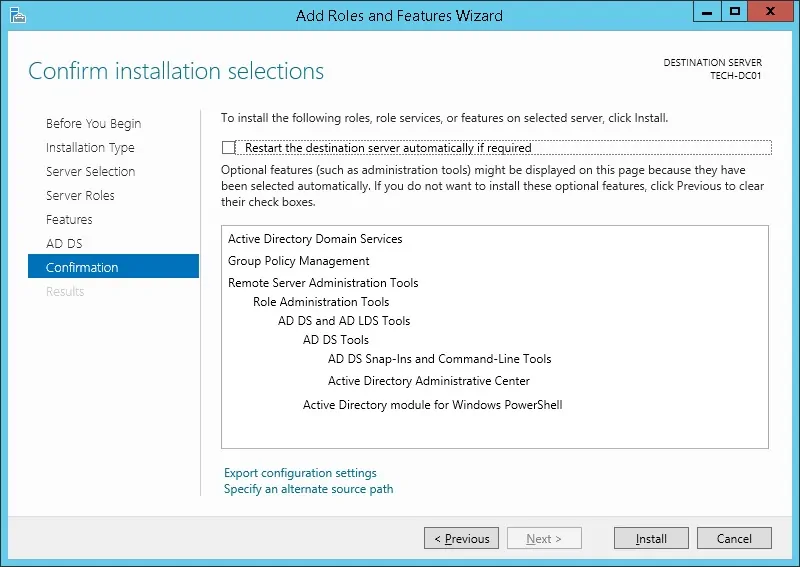
Wait the Active directory installation to finish.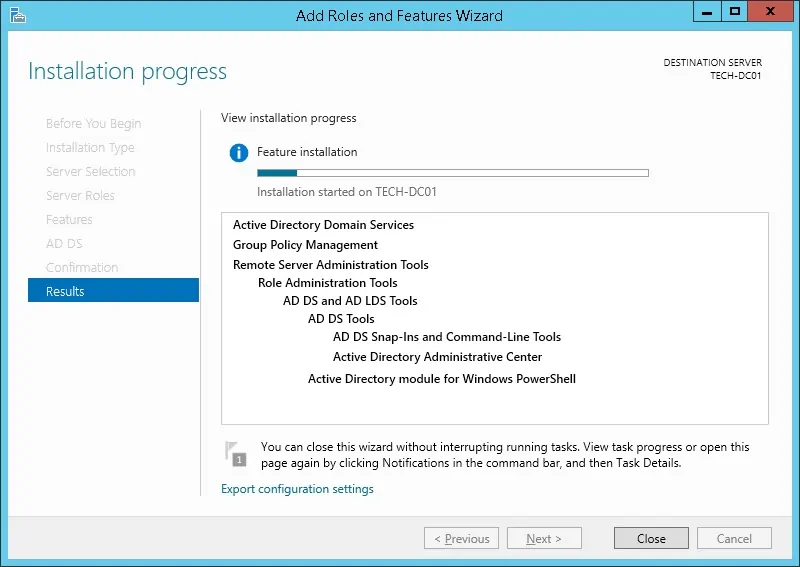
Open the Server Manager application.
Click on the yellow flag menu and select the option to promote this server to a domain controller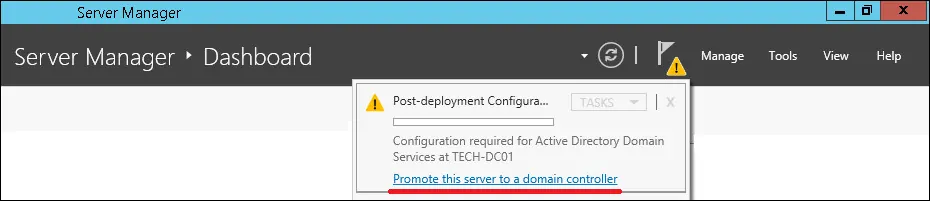
Select the option to Add a new forest and enter a root domain name.
In our example, we created a new domain named: TECH.LOCAL.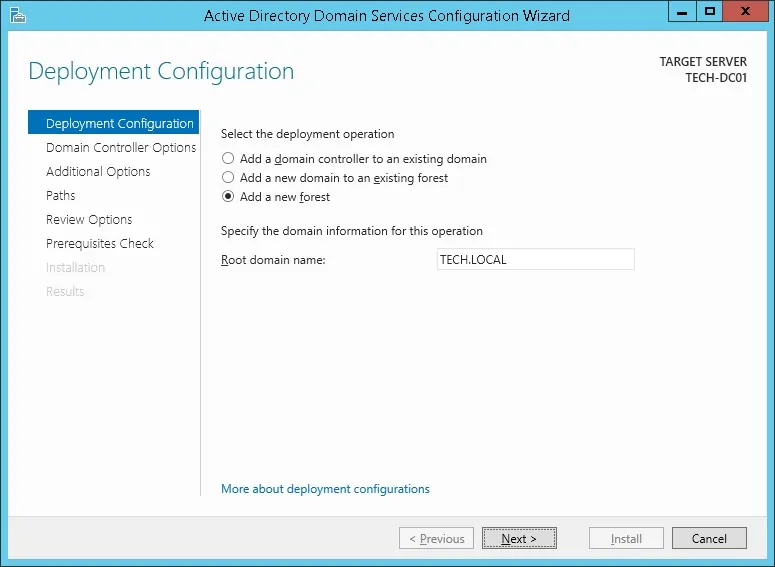
Enter a password to secure the Active Directory restoration.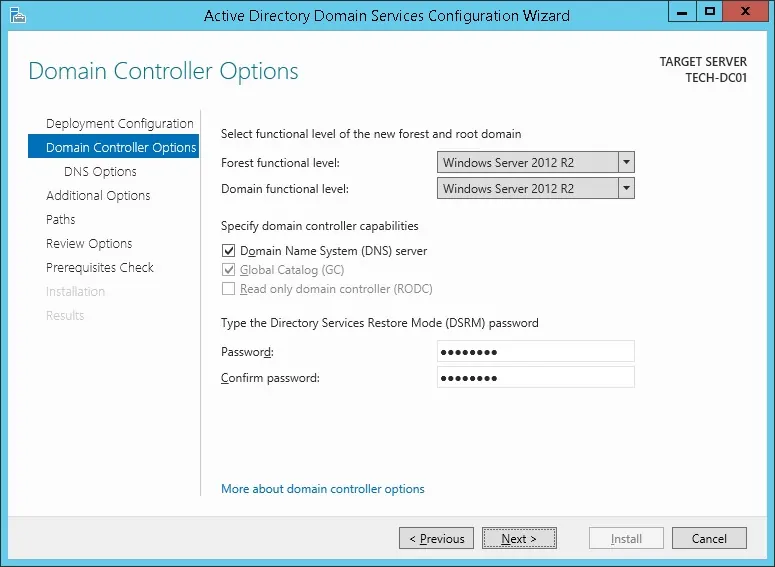
On the DNS options screen, click on the Next button.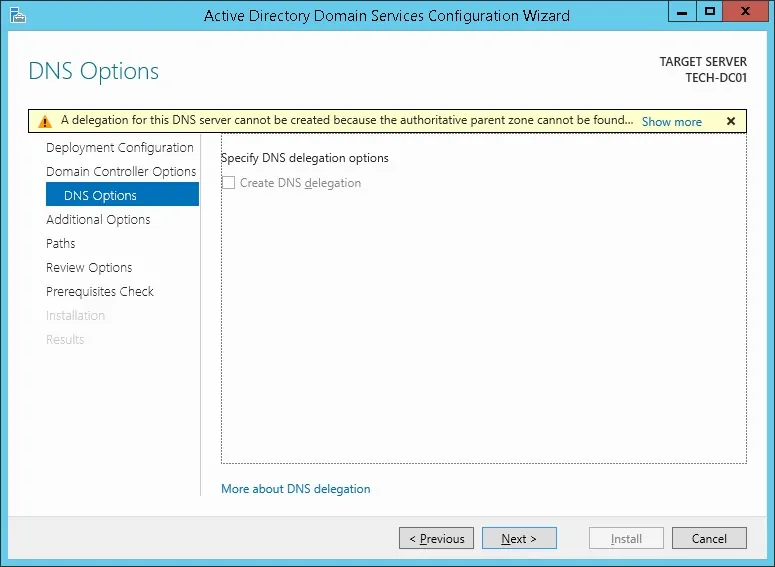
Verify the Netbios name assigned to your domain and click on the Next button.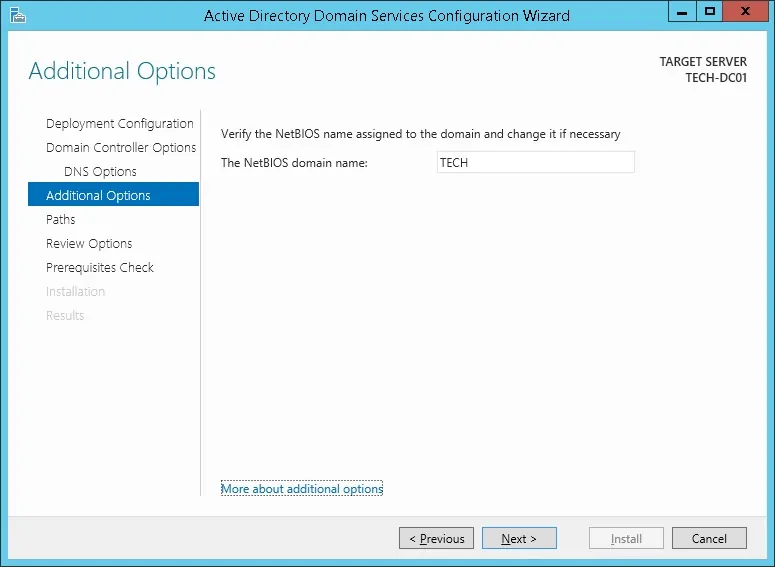
Click on the Next button.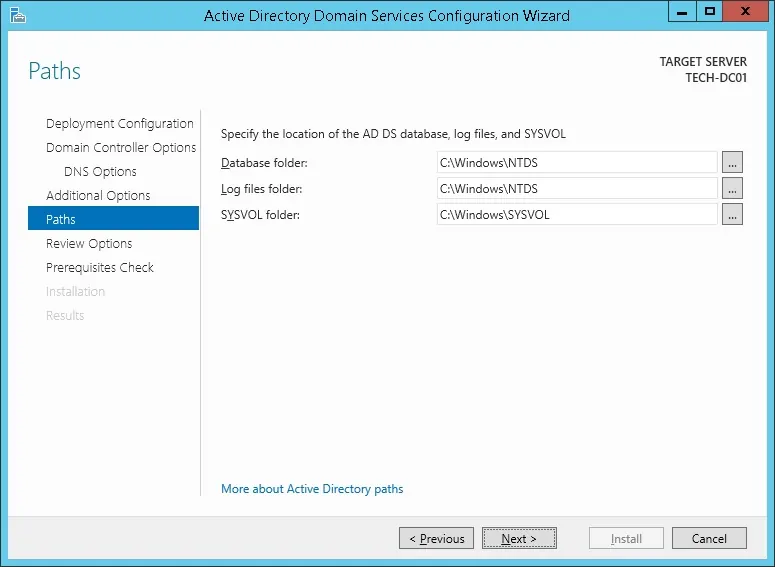
Review your configuration options and click on the Next button.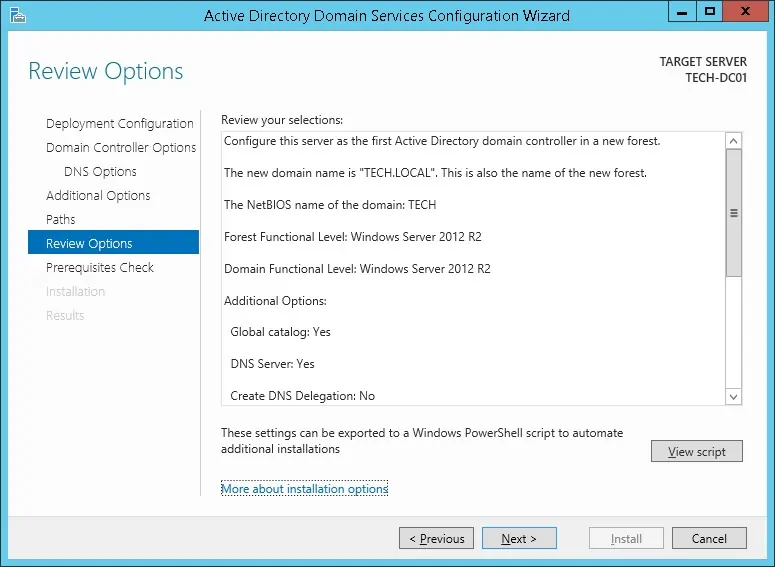
On the Prerequisites Check screen, click on the Install button.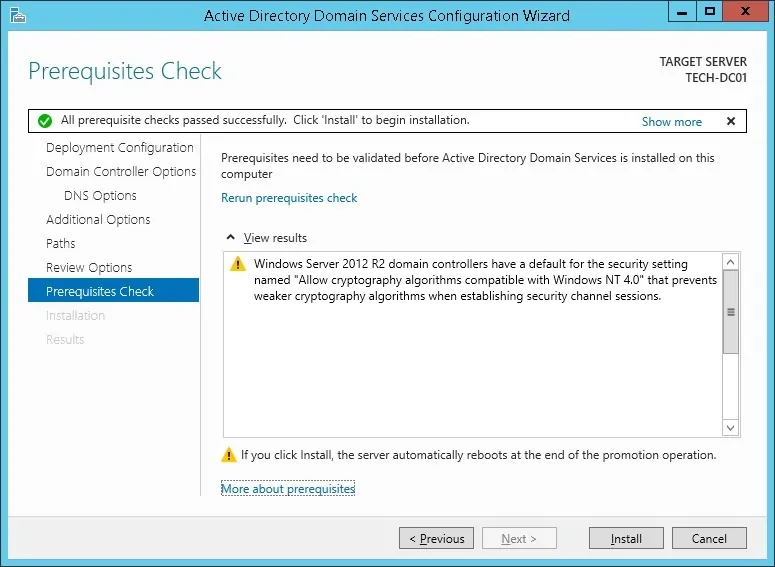
Wait the Active Directory Configuration to finish.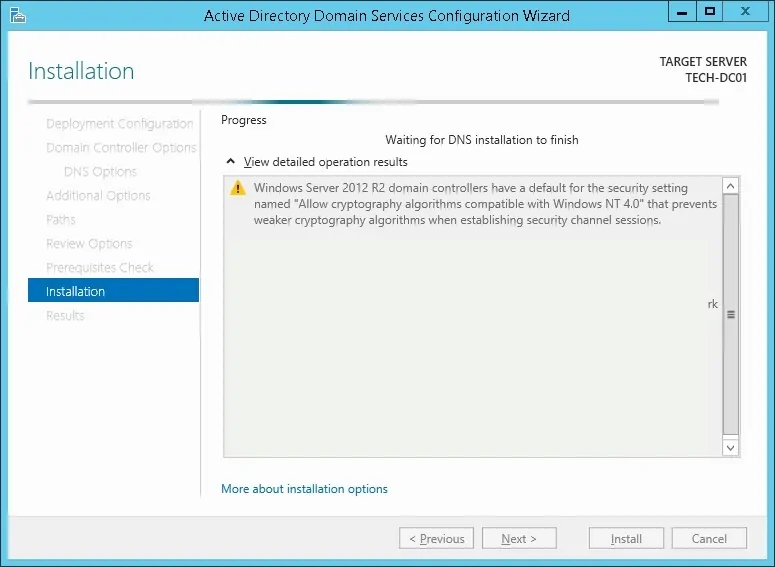
After finishing the Active directory installation, the computer will restart automatically
You have finished the Active directory configuration on Windows server.
PFSense - Testing the LDAP over SSL communication
We need to test if your domain controller is offering the LDAP over SSL service on port 636.
On the domain controller, access the start menu and search for the LDP application.
First, let's test if your domain controller is offering the LDAP service on port 389.
Access the Connection menu and select the Connect option.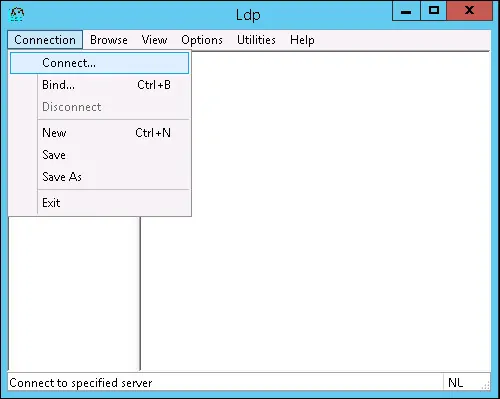
Try to connect to the localhost using the TCP port 389.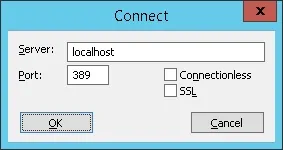
You should be able to connect to the LDAP service on the localhost port 389.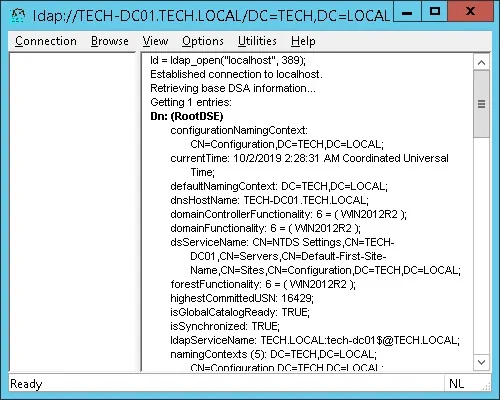
Now, we need to test if your domain controller is offering the LDAP over SSL service on port 636.
Open a new LDP application Window and try to connect to the localhost using the TCP port 636.
Select the SSL checkbox and click on the Ok button.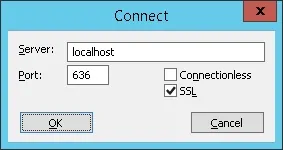
If the system displays an error message, your domain controller is not offering the LDAPS service yet.
To solve this, we are going to install a Windows Certification authority on the next part of this tutorial.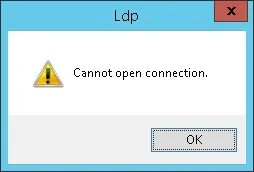
If you were able to successfully connect to the localhost on port 636 using SSL encryption, you may skip the next part of this tutorial.
Tutorial - Certification Authority Installation on Windows
We need to install the Windows certification authority service.
The local certification authority will provide the domain controller with a certificate that will allow the LDAPS service to operate on the TCP port 636.
Open the Server Manager application.
Access the Manage menu and click on Add roles and features.
Access the Server role screen, select the Active Directory Certificate Services and click on the Next button.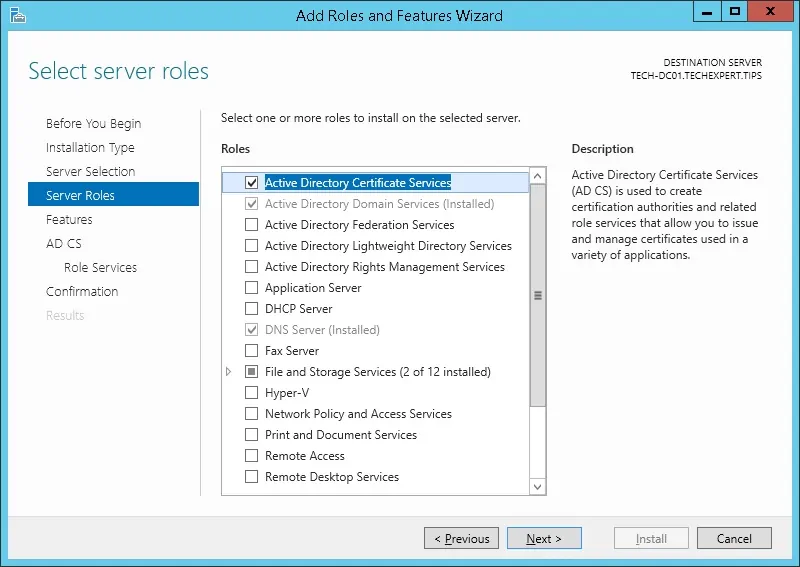
On the following screen, click on the Add features button.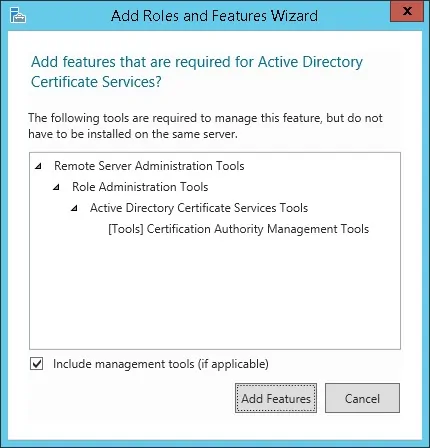
Keep clicking on the Next button until you reach the role service screen.
Enable the option named Certification Authority and click on the Next button.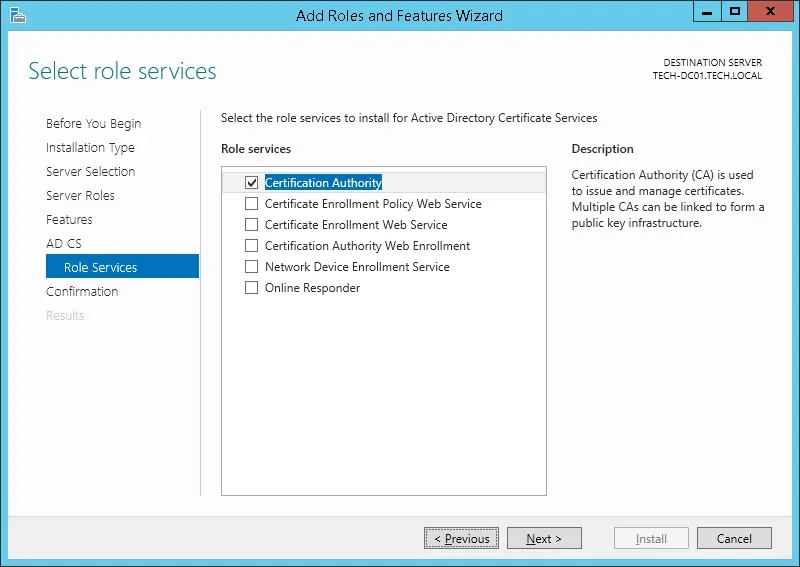
On the confirmation screen, click on the Install button.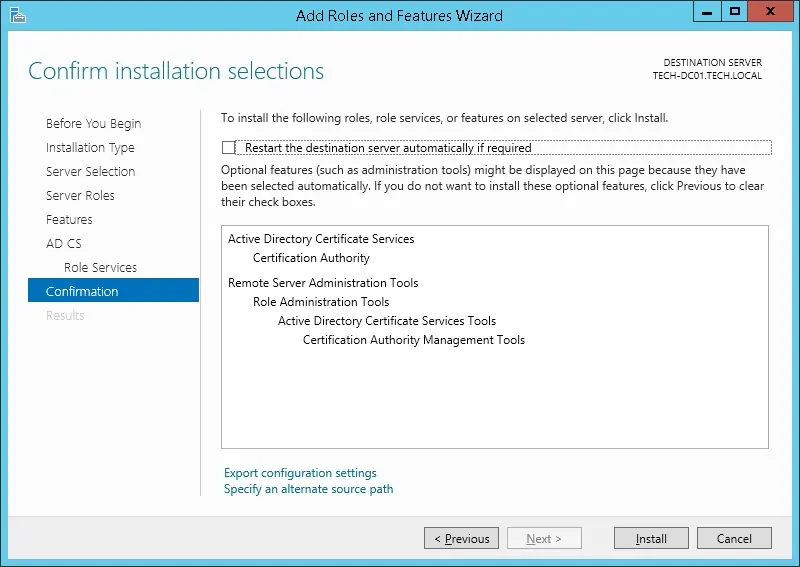
Wait the Certification Authority installation to finish.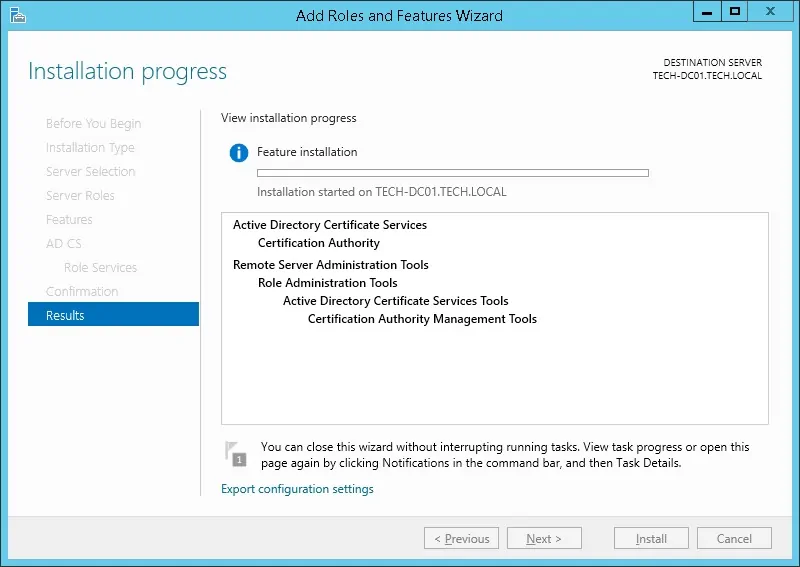
Open the Server Manager application.
Click on the yellow flag menu and select the option: Configure Active Directory Certificate Services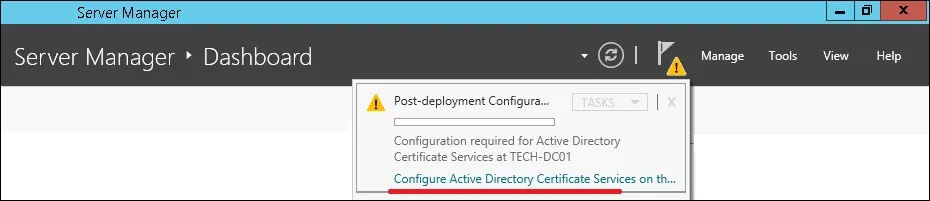
On the credentials screen, click on the Next button.
Select the Certification Authority option and click on the Next button.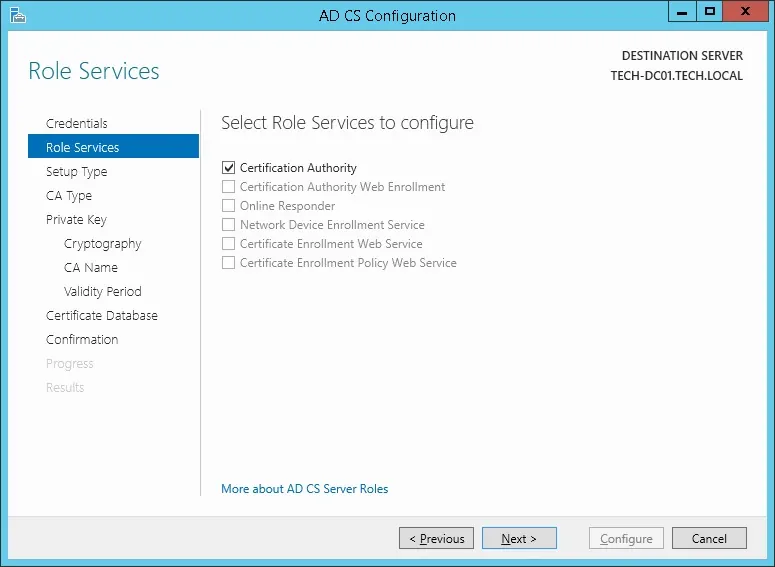
Select the Enterprise CA option and click on the Next button.
Select the Create a new private key option and click on the Next button.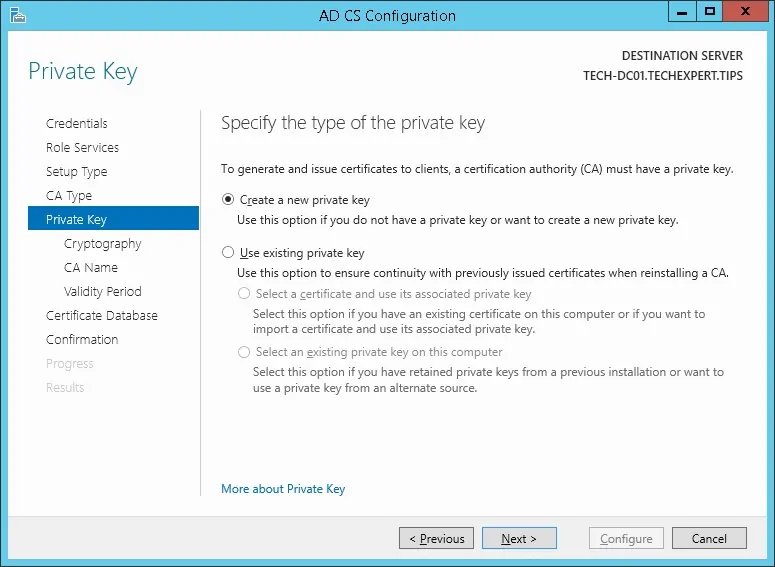
Keep the default cryptography configuration and click on the Next button.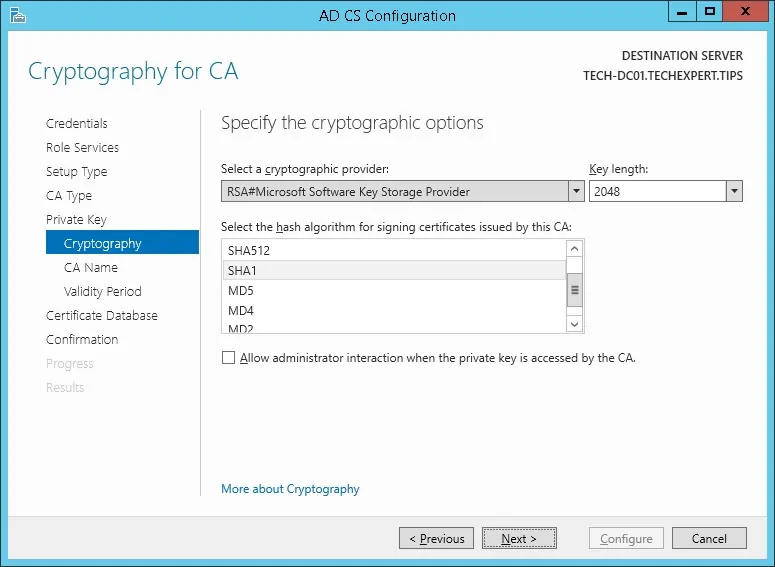
Set a common name to the Certification authority and click on the Next button.
In our example, we set the common name: TECH-CA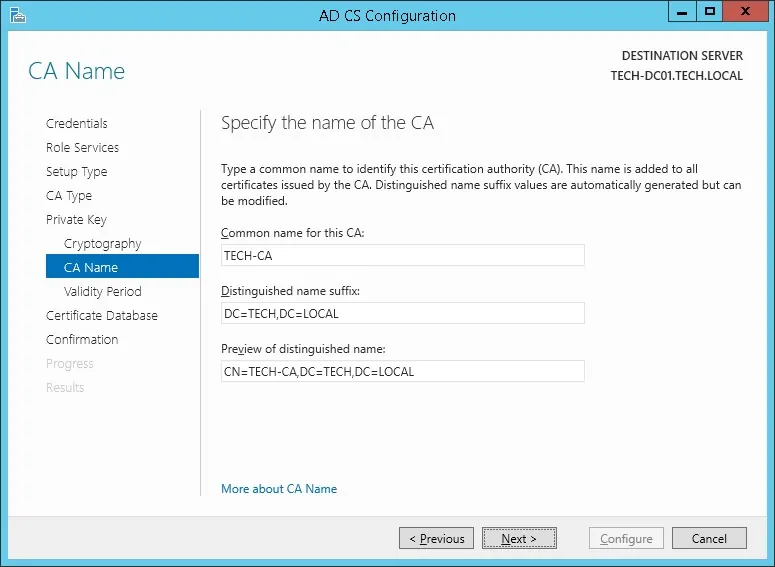
Set the Windows Certification authority validity period.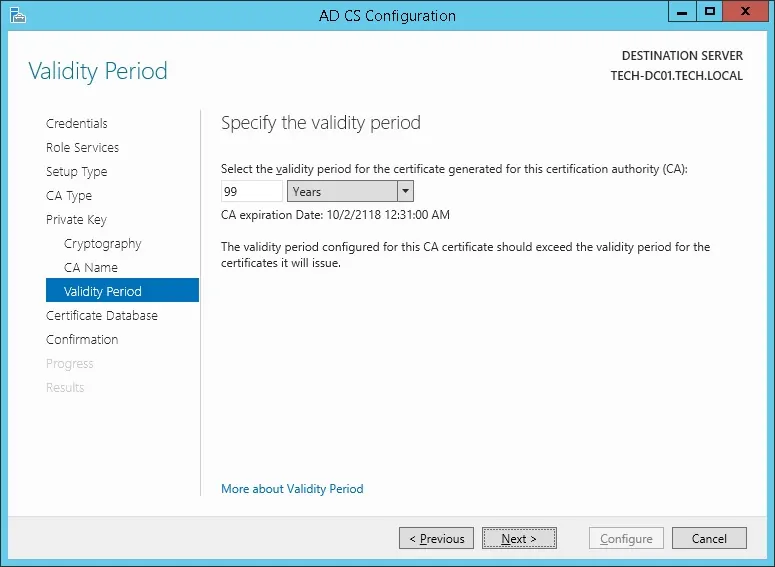
Keep the default Windows Certification authority database location.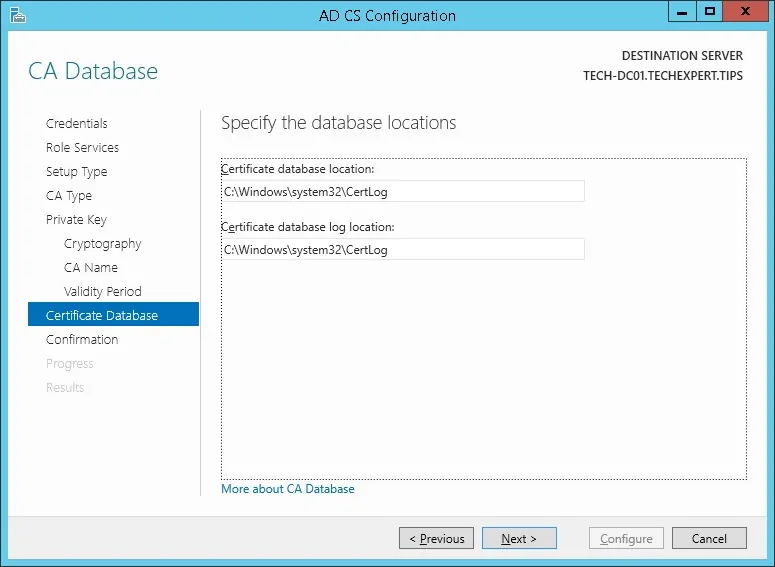
Verify the summary and click on the Configure button.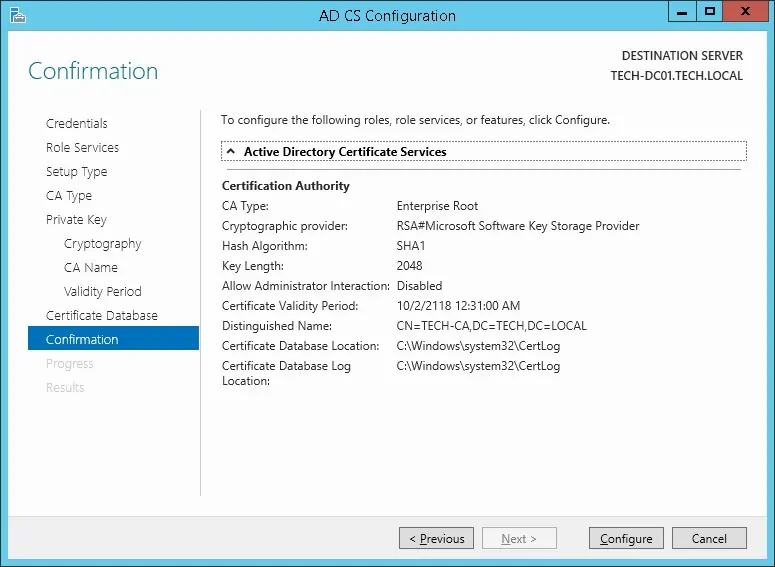
Wait for the Windows server certification authority installation to finish.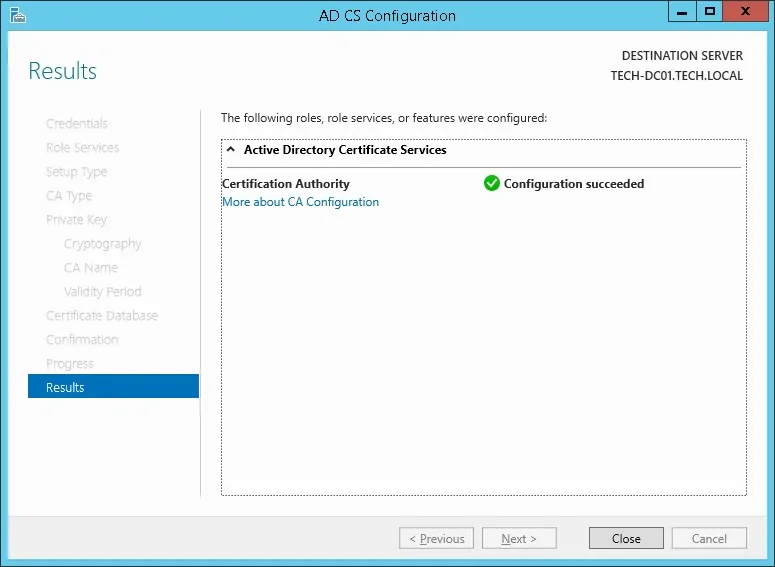
After finishing the certification authority installation, reboot your computer.
You have finished the Windows Certification authority installation.
PFSense - Testing the LDAP over SSL Communication Again
We need to test if your domain controller is offering the LDAP over SSL service on port 636.
After finishing the Certification authority installation, wait 5 minutes and restart your domain controller.
During boot time, your domain controller will automatically request a server certificate from the local certification authority.
After getting the server certificate, your domain controller will start offering the LDAP service over SSL on the 636 port.
On the domain controller, access the start menu and search for the LDP application.
Access the Connection menu and select the Connect option.
Try to connect to the localhost using the TCP port 636.
Select the SSL checkbox and click on the Ok button.
Try to connect to the localhost using the TCP port 636.
Select the SSL checkbox and click on the Ok button.
This time, you should be able to connect to the LDAP service on the localhost port 636.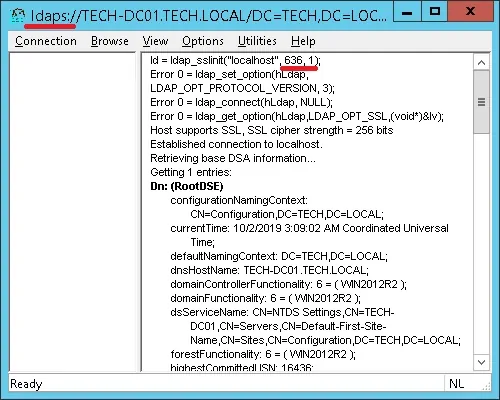
If you are not able to connect to port 636, reboot the computer again and wait 5 minutes more.
It may take sometime before your domain controller receives the certificate requested from the Certification Authority.
Tutorial - Windows Domain Controller Firewall
We need to create a Firewall rule on the Windows domain controller.
This firewall rule will allow the Pfsense server to query the Active directory database.
On the domain controller, open the application named Windows Firewall with Advanced Security
Create a new Inbound firewall rule.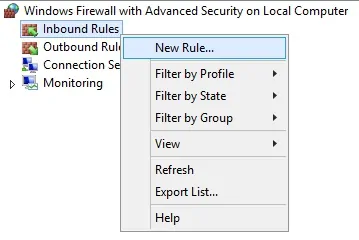
Select the PORT option.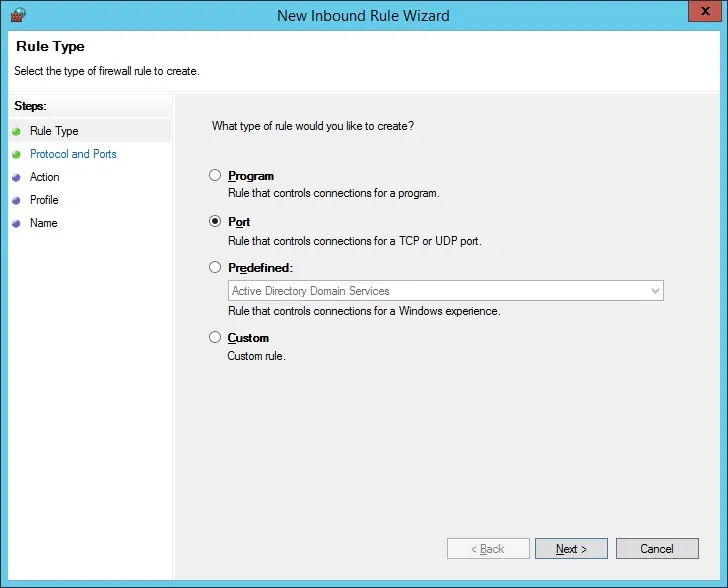
Select the TCP option.
Select the Specific local ports option.
Enter the TCP port 636.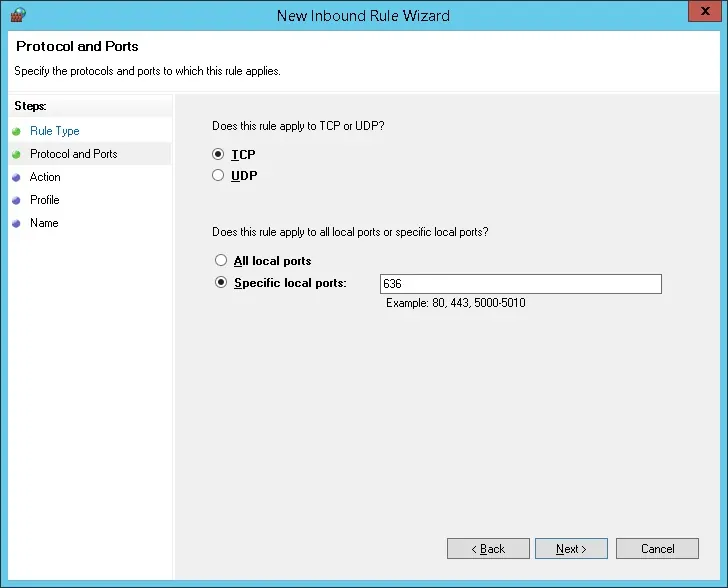
Select the Allow the connection option.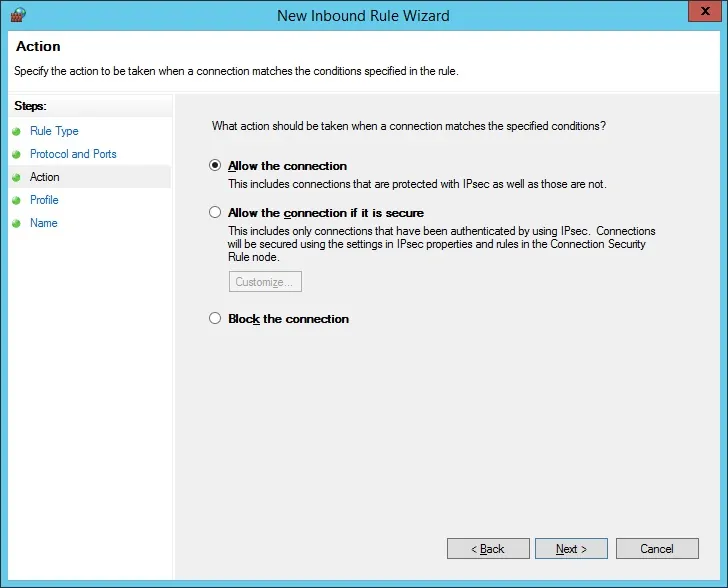
Check the DOMAIN option.
Check the PRIVATE option.
Check the PUBLIC option.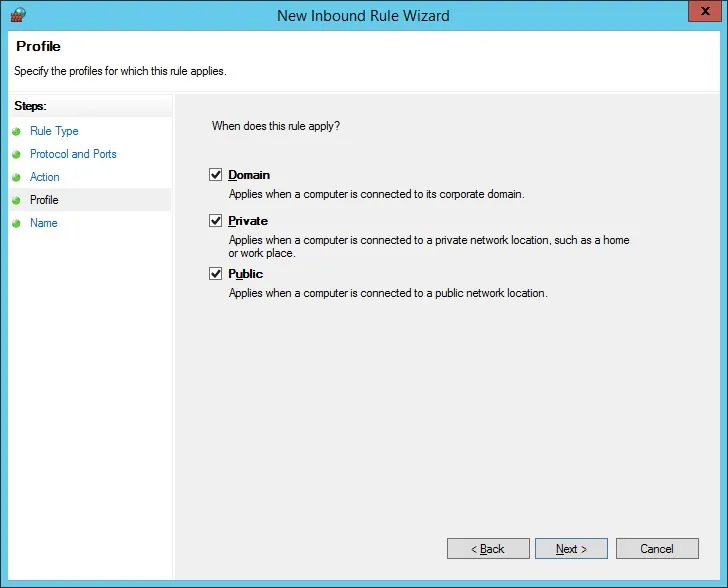
Enter a description to the firewall rule.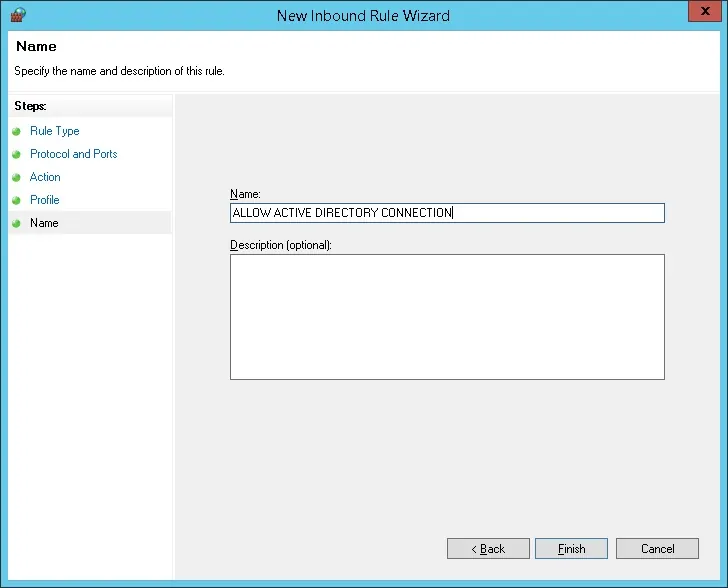
Congratulations, you have created the required firewall rule.
This rule will allow Pfsense to query the Active directory database.
Tutorial - Preparing the PFSense LDAPS Communication
Access the PFsense console menu and select the option number 8 to have access to the command-line.
Use the following command to test the LDAPS communication.
It will try to get a copy of the domain controller certificate. Copy to Clipboard1
openssl s_client -showcerts -connect 192.168.15.10:636
Keep in mind that you need to change the IP address above to your Domain controller.
The system should display a copy of the Domain Controller certificate.Copy to Clipboard1
CONNECTED(00000003)
depth=0 CN = TECH-DC01.TECH.LOCAL
verify error:num=20:unable to get local issuer certificate
verify return:1
depth=0 CN = TECH-DC01.TECH.LOCAL
verify error:num=21:unable to verify the first certificate
verify return:1
---
Certificate chain
 0 s:/CN=TECH-DC01.TECH.LOCAL
   i:/DC=LOCAL/DC=TECH/CN=TECH-CA
-----BEGIN CERTIFICATE-----
MIIF0TCCBLmgAwIBAgITYgAAAAKR0uMAYmVSUAAAAAAAAjANBgkqhkiG9w0BAQUF
ADA/MRUwEwYKCZImiZPyLGQBGRYFTE9DQUwxFDASBgoJkiaJk/IsZAEZFgRURUNI
MRAwDgYDVQQDEwdURUNILUNBMB4XDTE5MTAwMjAxNDUyOFoXDTIwMTAwMTAxNDUy
OFowHzEdMBsGA1UEAxMUVEVDSC1EQzAxLlRFQ0guTE9DQUwwggEiMA0GCSqGSIb3
DQEBAQUAA4IBDwAwggEKAoIBAQDbEowRoMmpHUWLIai7agvz5CMfBN6rNGSzrmBu
tddGZcNuor8LNsM/cWAIjOEv3q6h5xczE+gnBDu8JdsSRLES+roRxOCI3lTNCQvb
7TYYCc1+6nXh2izhxj+xRX4JD90v2PxL16epp2CLlH6n7kvout1kOHF7bSf3oNcF
r30JsiseW0t44Ijbsy99FDrfwVjaiU0qfCMTc18aVUQKDaCnzGnOWysoYSmB1Beu
2syZ9AaqkFz2iaBOLzKKutaQorHCzX7/ruUakIzIHUbx3usZHqQdELISHWiadBjw
a3KvQNpLfMmKSybz8rms80Xi57bHQlg8TSxEeQuNSM8fVS5nAgMBAAGjggLkMIIC
4DAvBgkrBgEEAYI3FAIEIh4gAEQAbwBtAGEAaQBuAEMAbwBuAHQAcgBvAGwAbABl
AHIwHQYDVR0lBBYwFAYIKwYBBQUHAwIGCCsGAQUFBwMBMA4GA1UdDwEB/wQEAwIF
oDB4BgkqhkiG9w0BCQ8EazBpMA4GCCqGSIb3DQMCAgIAgDAOBggqhkiG9w0DBAIC
AIAwCwYJYIZIAWUDBAEqMAsGCWCGSAFlAwQBLTALBglghkgBZQMEAQIwCwYJYIZI
AWUDBAEFMAcGBSsOAwIHMAoGCCqGSIb3DQMHMB0GA1UdDgQWBBQpyuAHlRliyuPp
+p1jvgU1EvqxejAfBgNVHSMEGDAWgBSWAptN6Wv3nfbUeOYwob7seGhYTzCBxgYD
VR0fBIG+MIG7MIG4oIG1oIGyhoGvbGRhcDovLy9DTj1URUNILUNBLENOPVRFQ0gt
REMwMSxDTj1DRFAsQ049UHVibGljJTIwS2V5JTIwU2VydmljZXMsQ049U2Vydmlj
ZXMsQ049Q29uZmlndXJhdGlvbixEQz1URUNILERDPUxPQ0FMP2NlcnRpZmljYXRl
UmV2b2NhdGlvbkxpc3Q/YmFzZT9vYmplY3RDbGFzcz1jUkxEaXN0cmlidXRpb25Q
b2ludDCBuAYIKwYBBQUHAQEEgaswgagwgaUGCCsGAQUFBzAChoGYbGRhcDovLy9D
Tj1URUNILUNBLENOPUFJQSxDTj1QdWJsaWMlMjBLZXklMjBTZXJ2aWNlcyxDTj1T
ZXJ2aWNlcyxDTj1Db25maWd1cmF0aW9uLERDPVRFQ0gsREM9TE9DQUw/Y0FDZXJ0
aWZpY2F0ZT9iYXNlP29iamVjdENsYXNzPWNlcnRpZmljYXRpb25BdXRob3JpdHkw
QAYDVR0RBDkwN6AfBgkrBgEEAYI3GQGgEgQQgv2rfFfv7EWeBvteXHi1xIIUVEVD
SC1EQzAxLlRFQ0guTE9DQUwwDQYJKoZIhvcNAQEFBQADggEBAAwpAMocs+9U8xv0
3ox60Vvw03DSzXwXPV9POK1tPQTugtA3PIHye3WPzWFLkPwKmbKd+FcZEpljz0U7
rg8PbgL1g4y7SnnG4b/qi8z9kLhDOWAuNT40f7T3Cwprnxo3p5tDIv9UCMrk29JQ
o2c9q0N1FaLpG/UgEaoi10UfLk/+HBAstT3bNYXvGX2Zsb2D6CG/xNmGUdLDCYNR
Oso+w1j7h/48+8MWKiVIyP7tUzRcQEFDRcA3tJpeaNhJ2w3YcfY3VFipFQaM4IDo
bu1MTplcszrNUIADrAnh9icugmbDKOoTmN3rqiKwhxfa2FyFZQypSJaWRzfpCNbP
k/YyGNo=
-----END CERTIFICATE-----
---
Server certificate
subject=/CN=TECH-DC01.TECH.LOCAL
issuer=/DC=LOCAL/DC=TECH/CN=TECH-CA
---
No client certificate CA names sent
Client Certificate Types: RSA sign, DSA sign, ECDSA sign
Requested Signature Algorithms: RSA+SHA512:ECDSA+SHA512:RSA+SHA256:RSA+SHA384:RS                                                                                                                     A+SHA1:ECDSA+SHA256:ECDSA+SHA384:ECDSA+SHA1:DSA+SHA1
Shared Requested Signature Algorithms: RSA+SHA512:ECDSA+SHA512:RSA+SHA256:RSA+SH                                                                                                                     A384:RSA+SHA1:ECDSA+SHA256:ECDSA+SHA384:ECDSA+SHA1:DSA+SHA1
Peer signing digest: SHA1
Server Temp Key: ECDH, P-256, 256 bits
---
SSL handshake has read 2063 bytes and written 501 bytes
---
New, TLSv1/SSLv3, Cipher is ECDHE-RSA-AES256-SHA384
Server public key is 2048 bit
Secure Renegotiation IS supported
Compression: NONE
Expansion: NONE
No ALPN negotiated
SSL-Session:
    Protocol  : TLSv1.2
    Cipher    : ECDHE-RSA-AES256-SHA384
    Session-ID: EC1A0000F6130E13A35CAD47078B692A7CE1EA5759905A7C6EBE25B55984FE17
    Session-ID-ctx:
    Master-Key: 53D98FEB36F897F4B2143962CF9018E69C5E67A026597B2C5DED9C8D05BF27D1                                                                                                                     265505CDC8B8EFC7F1EFE974EFCF9ECB
    Key-Arg   : None
    PSK identity: None
    PSK identity hint: None
    SRP username: None
    Start Time: 1569986693
    Timeout   : 300 (sec)
    Verify return code: 21 (unable to verify the first certificate)
The PFsense firewall must be able to communicate with the domain controller using its DNS name. (FQDN)
The Pfsense may use the domain controller as a DNS server to be able to translate TECH-DC01.TECH.LOCAL to the IP address 192.168.15.10.
Use the PING command to verify if the PFsense firewall is able to translate the hostname to IP address.Copy to Clipboard1
ping TECH-DC01.TECH.LOCAL
PING TECH-DC01.TECH.LOCAL (192.168.15.10): 56 data bytes
In our example, the Pfsense firewall was able to translate the TECH-DC01.TECH.LOCAL hostname to 192.168.15.10.
Tutorial - Windows Domain Account Creation
Next, we need to create at least 2 accounts on the Active directory database.
The ADMIN account will be used to login on the Pfsense web interface.
The BIND account will be used to query the Active Directory database.
On the domain controller, open the application named: Active Directory Users and Computers
Create a new account inside the Users container.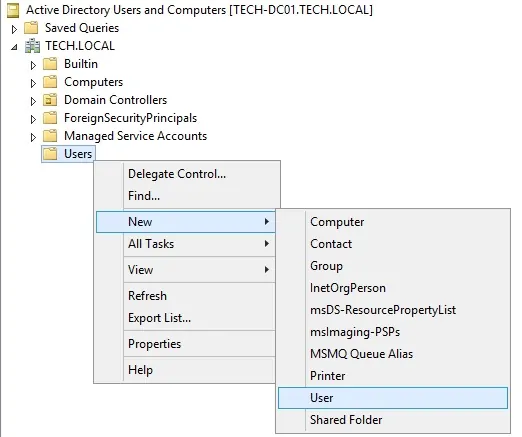
Create a new account named: admin
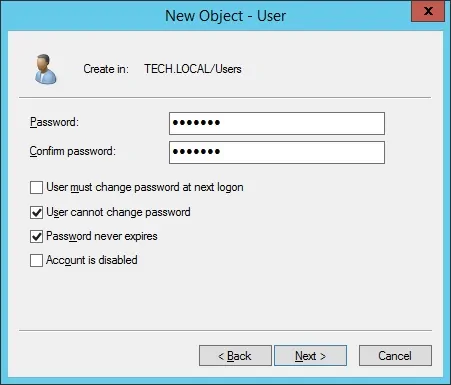
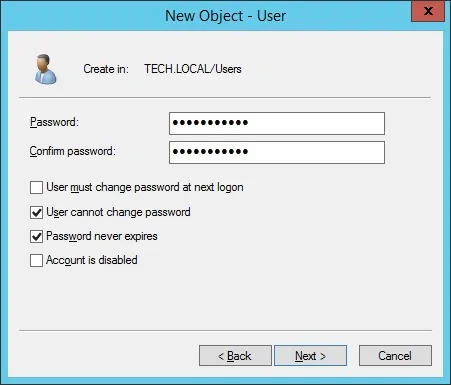
Password configured to the ADMIN user: 123qwe..
This account will be used to authenticate as admin on the Pfsense web interface.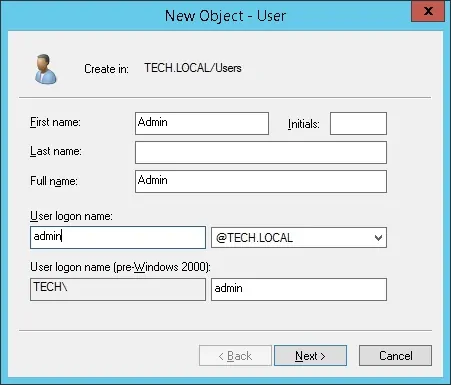
Create a new account named: bind
Password configured to the BIND user: 123qwe..
This account will be used to query the passwords stored on the Active Directory database.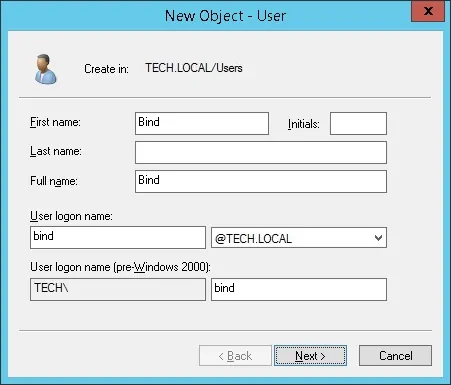
Congratulations, you have created the required Active Directory accounts.
Tutorial - Windows Domain Group Creation
Next, we need to create at least 1 group on the Active directory database.
On the domain controller, open the application named: Active Directory Users and Computers
Create a new group inside the Users container.
Create a new group named: pfsense-admin
Members of this group will have the Admin permission on the PFsense web interface.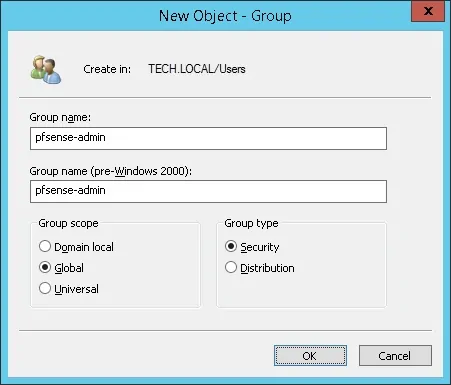
Important! Add the admin user as a member of the pfsense-admin group.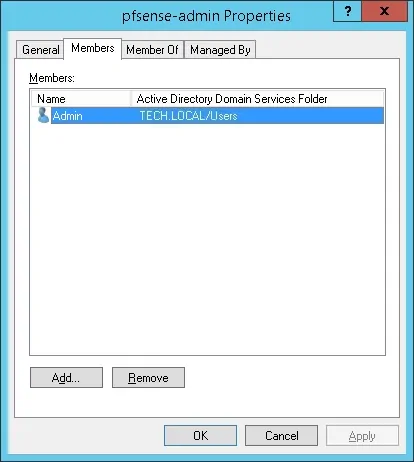
Congratulations, you have created the required Active Directory group.
PFSense - PFSense LDAPS Authentication on Active Directory
Open a browser software, enter the IP address of your Pfsense firewall and access web interface.
In our example, the following URL was entered in the Browser:
• https://192.168.15.11
The Pfsense web interface should be presented.
On the prompt screen, enter the Pfsense Default Password login information.
• Username: admin
• Password: pfsense
After a successful login, you will be sent to the Pfsense Dashboard.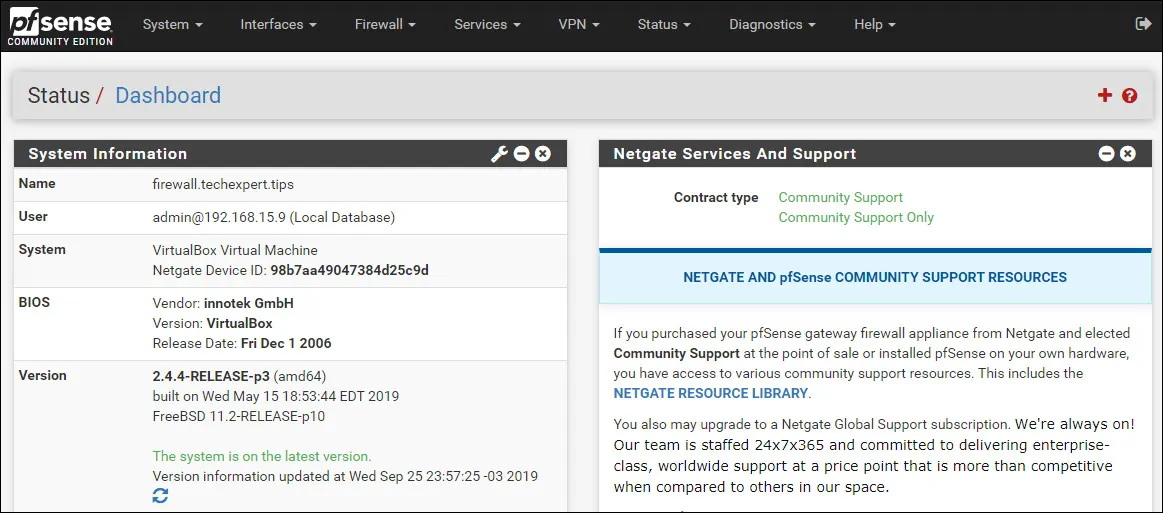
Access the Pfsense System menu and select the User manager option.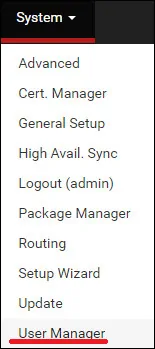
On the User manager screen, access the Authentications servers tab and click on the Add button.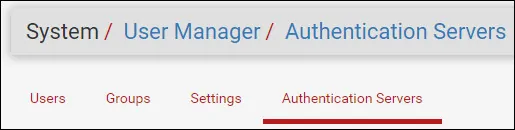
On the Server settings area, perform the following configuration:
• Description name: ACTIVE DIRECTORY
• Type: LDAP
On the LDAP Server settings area, perform the following configuration:
• Hostname or IP address - TECH-DC01.TECH.LOCAL
• Port value - 636
• Transport - SSL - Encrypted
• Protocol version - 3
• Server Timeout - 25
• Search Scope - Entire Subtree
• Base DN - dc=tech,dc=local
• Authentication containers - CN=Users,DC=tech,DC=local
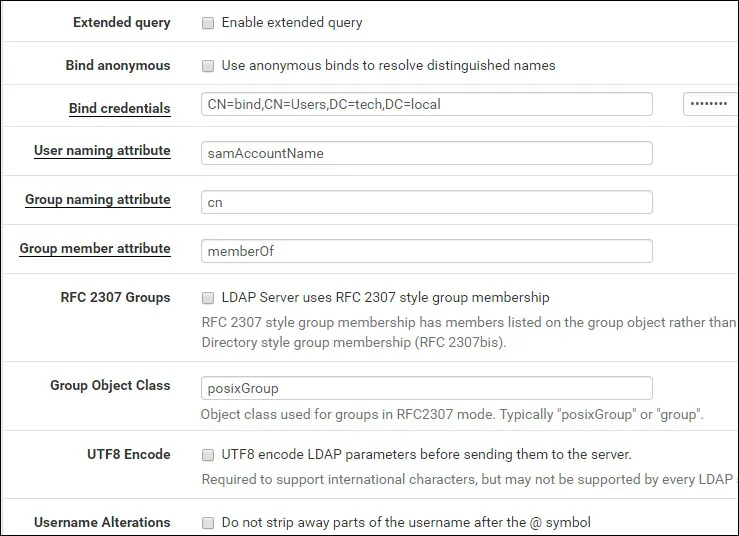
• Extended query - Disabled
• Bind anonymous - Disabled
• Bind credentials - CN=bind,CN=Users,DC=tech,DC=local
• Bind credentials Password - Password of the BIND user account
• Initial Template - Microsoft AD
• User naming attribute - samAccountName
• Group naming attribute - cn
• Group member attribute - memberOf
• RFC 2307 Groups - Disabled
• Group Object Class - posixGroup
• UTF8 Encode - Disabled
• Username Alterations - Disabled
You need to change TECH-DC01.TECH.LOCAL to your domain controller hostname.
You need to change the domain information to reflect your Network environment.
You need to change the bind credentials to reflect your Network environment.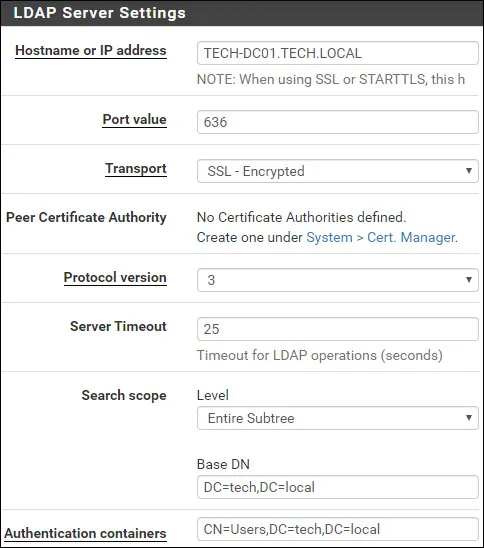
Click on the Save button to finish the configuration.
In our example, we configured the Ldap server authentication on the PFSense firewal.
PFSense - Testing Active Directory Authentication
Access the Pfsense Diagnostics menu and select the Authentication option.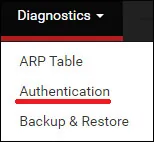
Select the Active directory authentication server.
Enter the Admin username, its password and click on the Test button.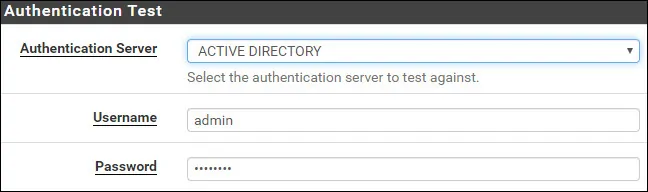
If your test succeeds, you should see the following message.![]()
Congratulations! Your PFsense LDAPS server authentication on Active Directory was sucessfully configured.
PFSense - Active Directory Group Permission
Access the Pfsense System menu and select the User manager option.
On the User manager screen, access the Groups tab and click on the Add button.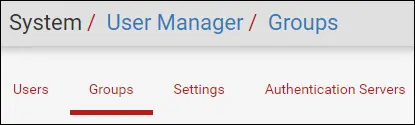
On the Group creation screen, perform the following configuration:
• Group name - pfsense-admin
• Scope - Remote
• Description - Active Directory group
Click on the Save button, you will be sent back to the Group configuration screen.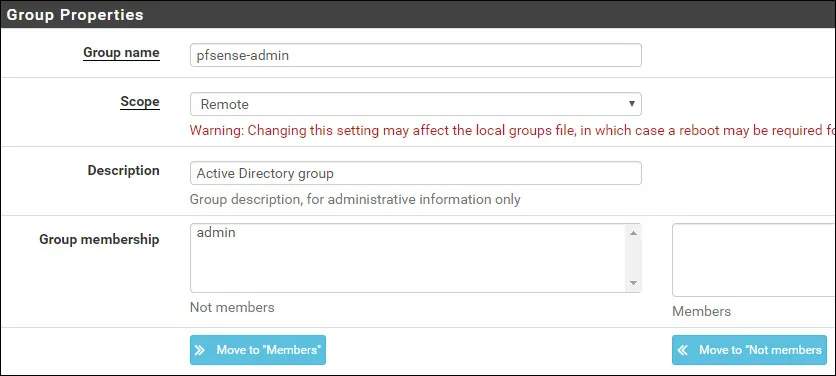
Now, you need to edit the permissions of the pfsense-admin group.
On the pfsense-admin group properties, locate the Assigned Privileges area and click on the Add button.
On the Group privilege area, perform the following configuration:
• Assigned privileges - WebCfg - All pages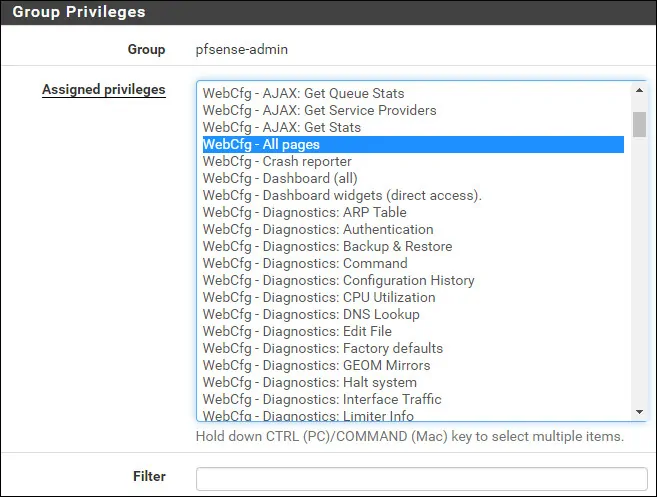
Click on the Save button to finish the configuration.
PFSense - Enable the Active Directory Authentication
Access the Pfsense System menu and select the User manager option.
On the User manager screen, access the Settings tab.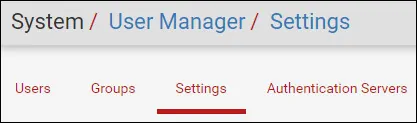
On the Settings screen, select the Active directory authentication server.
Click on the Save and test button.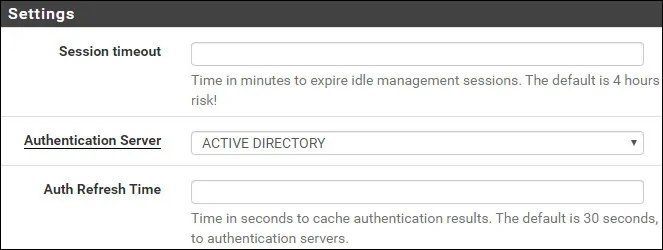
After finishing your configuration, you should log off the Pfsense web interface.
Try to login using the admin user and the password from the Active Directory database.
On the login screen, use the admin user and the password from the Active Directory database.
• Username: admin
• Password: Enter the Active directory password.
Congratulations! You have configured the PFSense authentication to use the Active Directory database.