PFSense - Enable SSH
PFSense - Enable SSH

PFSense - Enable SSH
Would you like to learn how to enable Pfsense SSH remote access? In this tutorial, we are going to show you all the steps required to enable the SSH service and configure the firewall to allow external connections to the TCP port 22.
• Pfsense 2.4.4-p3
PFSense - Enable SSH
Open a browser software, enter the IP address of your Pfsense firewall and access web interface.
In our example, the following URL was entered in the Browser:
• https://192.168.15.11
The Pfsense web interface should be presented.
On the prompt screen, enter the Pfsense Default Password login information.
• Username: admin
• Password: pfsense
After a successful login, you will be sent to the Pfsense Dashboard.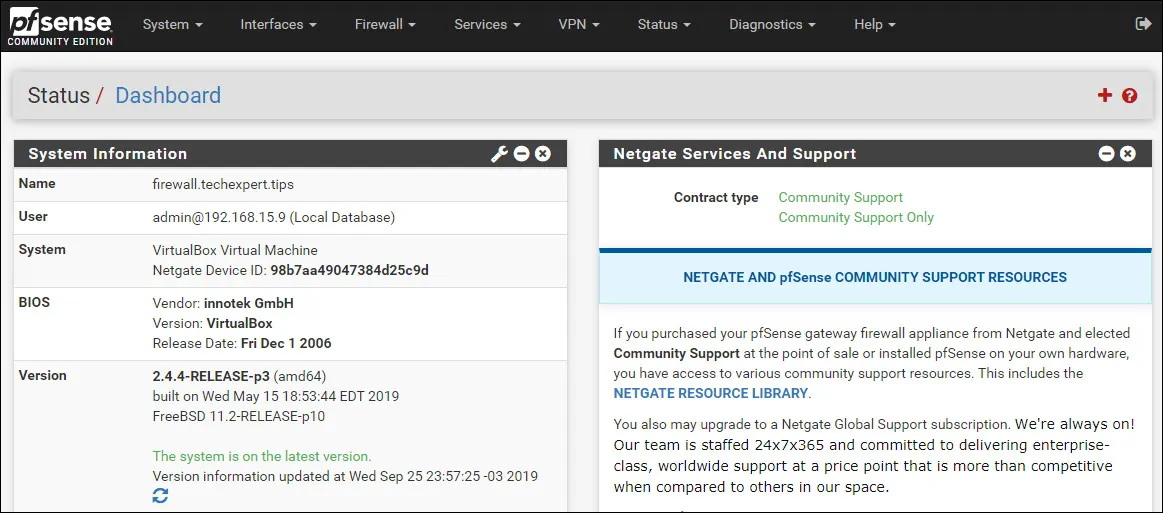
Access the Pfsense System menu and select the Advanced option.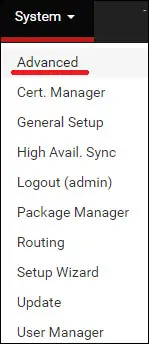
On the Admin access tab, locate the Secure Shell configuration ares.
Select the option named Enable Secure Shell.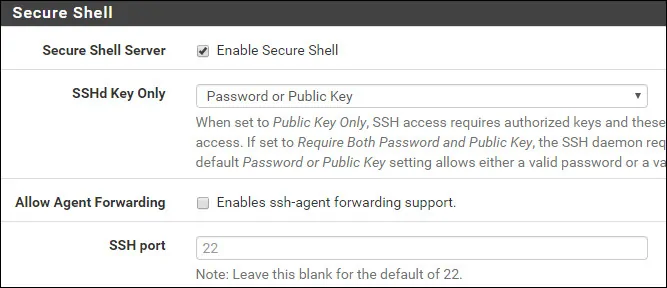
Click on the Save button to enable the SSH service immediately.
If you want to verify the SSH service status , acess the PFsense Status menu and select the Services option.
Here, you are able to verify the status of all services from the Pfsense firewall.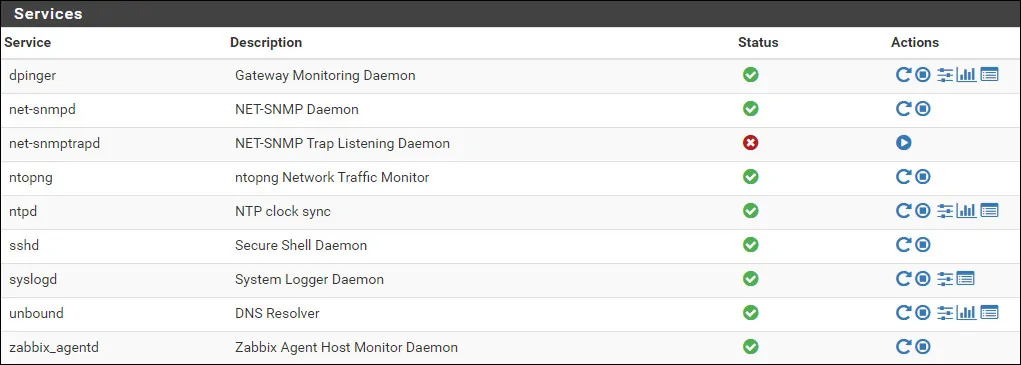
In our example, the SSHD service is up and running.
Congratulations! You have finished the Pfsense SSH service configuration.
PFSense - Allow SSH external connections
By default, the PFsense firewall does not allow external SSH connections to the WAN interface.
In our example we are going to create a firewall rule to allow the SSH communication.
Access the Pfsense Firewall menu and select the Rules option.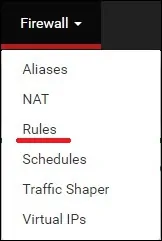
Click on the Add button to add a rule to the Top of the list.![]()
On the Firewall rule creation screen, perform the following configuration:
• Action - Pass
• Interface - WAN
• Address family - IPV4
• Protocol - TCP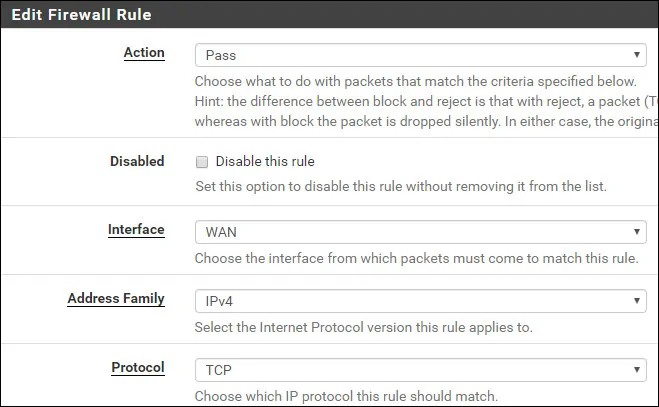
On the Source configuration screen, you need to define the IP address that should be allowed to perform SSH communication with the Pfsense firewall.
In our example, any computer is able to perform SSH communication with the firewall.
On the Firewall destination screen, perform the following configuration:
• Destination - Wan address
• Destination port range- From SSH (22) to SSH (22)
On the Firewall Extra options screen, you may enter a description to the firewall rule.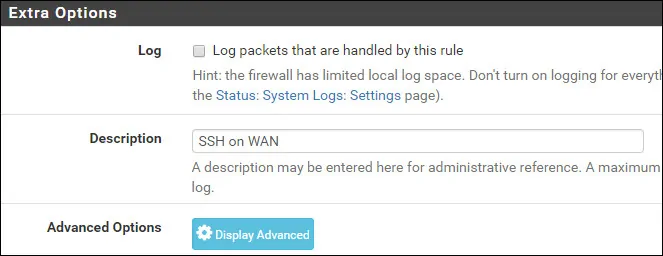
Click on the Save button, you will be sent back to the Firewall configuration screen.
Now, you need to reload the firewall rules to apply the SSH configuration.
Click on the Apply changes button to reload the firewall configuration.
You have finished the PFsense firewall configuration to allow SSH communication using the WAN interface.
PFSense - Testing the SSH configuration
Use the following commands to test the Pfsense SSH communication from a computer running Ubuntu Linux:.Copy to Clipboard1
ssh 200.200.200.200
2
ssh 192.168.15.11
Keep in mind that you need to change the PFsense IP address to reflect your environment.
You may test the remote connection to the WAN interface and also to the LAN interface.
To test the Pfsense SSH configuration from a computer running Windows:
Download the last version of the PUTTY application, and test the communication using the following parametes: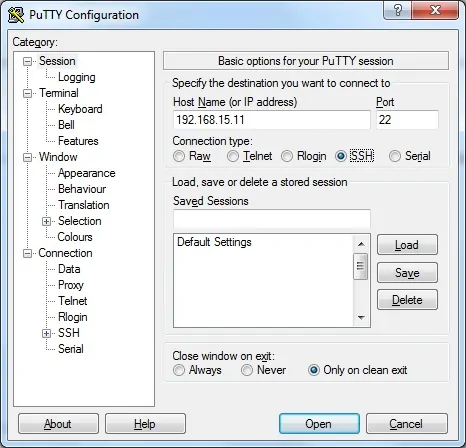
If you use older versions of the Putty software, you will not be able to connect to the PFsense firewall.
You have successfully performed a Pfsense SSH communication test.


